
If your Kitchenaid dryer is not heating, there may be a problem with the thermal fuse or heating element. First, ensure the dryer is plugged in and the circuit breaker is not tripped.
A Kitchenaid dryer that refuses to produce heat can be a frustrating experience. Most dryer malfunctions occur due to issues with the thermal fuse, heating element, or thermostat. Nevertheless, before you begin any repair work, check if the plug is properly inserted into the electrical socket and examine your home’s circuit breaker.
If the cause is more advanced than that, fix the problem by testing the thermal fuse or heater element with a multimeter. In this post, we’ll take you through a few basic steps to identify the source of the problem and provide some practical DIY guidance on how to address it.

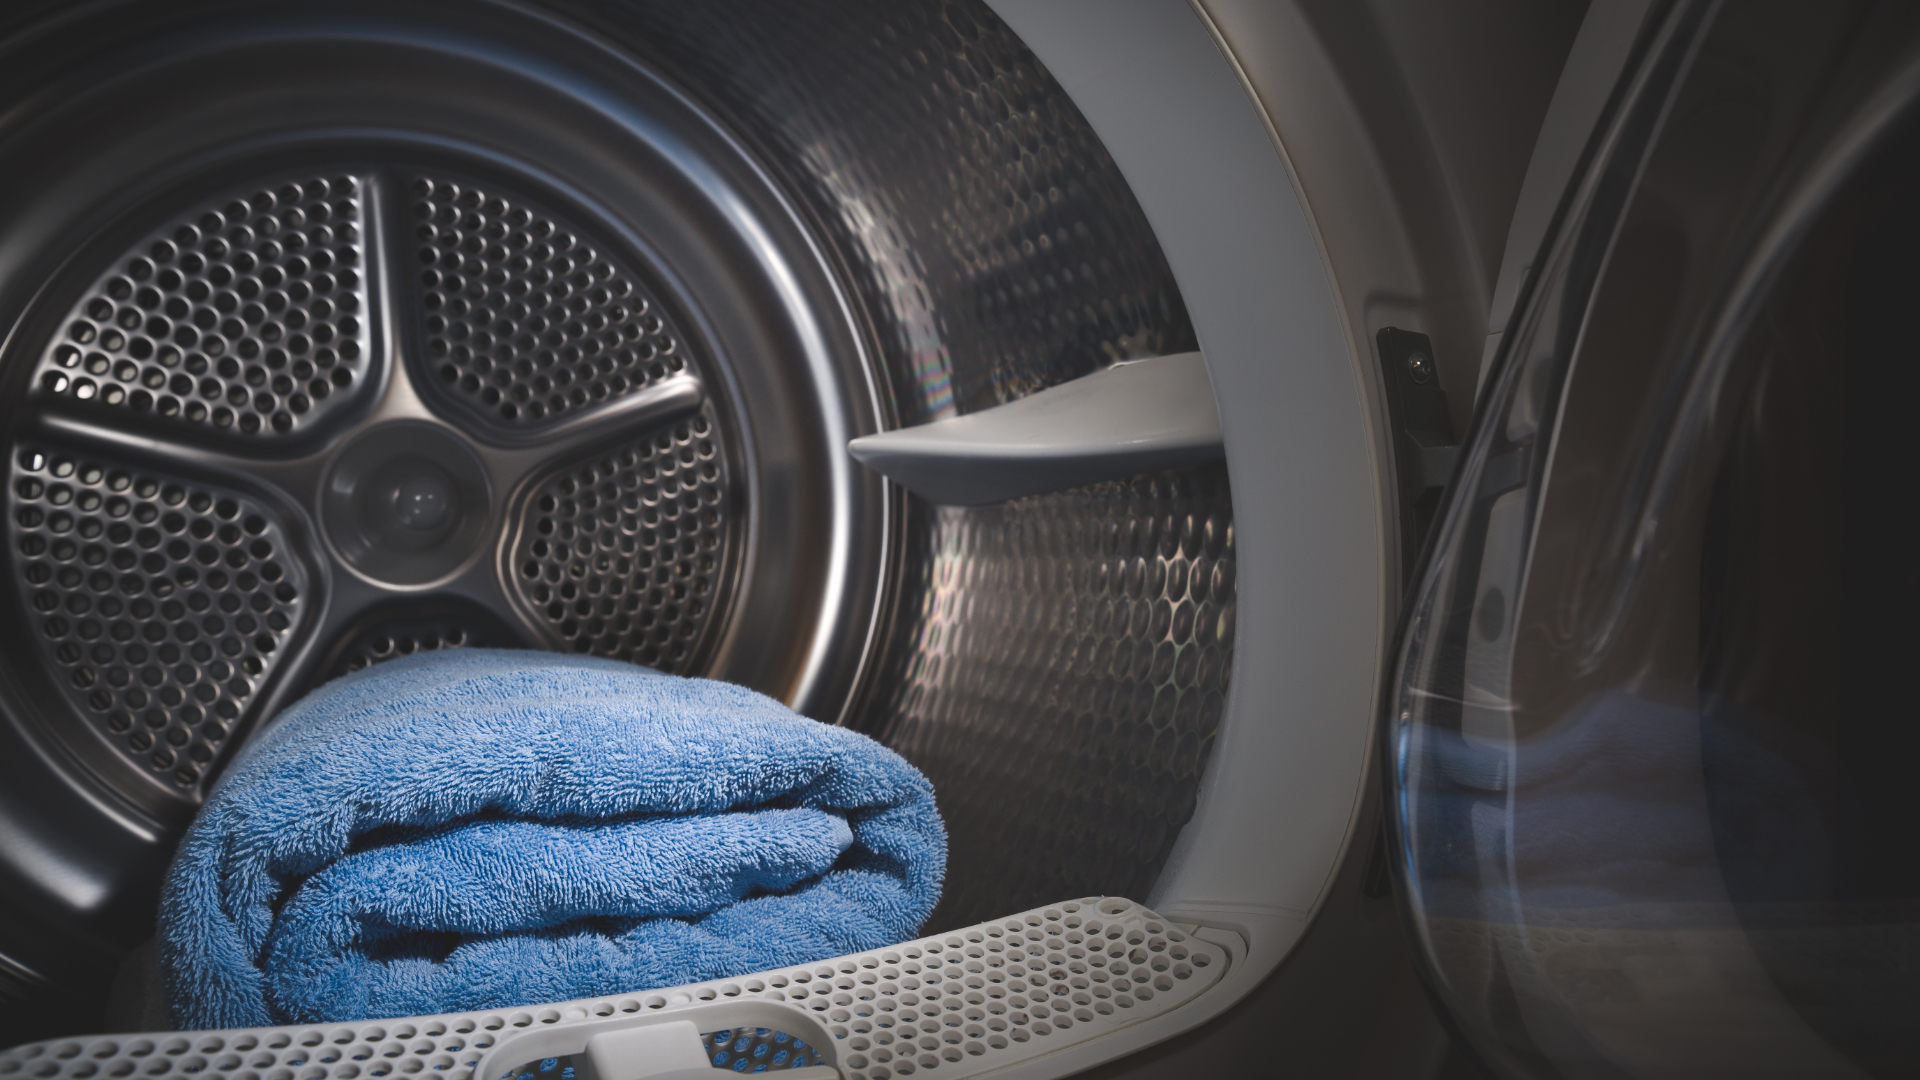
Credit: www.amazon.com
Possible Causes Of A Kitchenaid Dryer Not Heating
A malfunctioning heating element, faulty thermal fuse, or broken cycling thermostat are potential causes of a Kitchenaid dryer not generating heat. It’s essential to have these issues fixed as soon as possible to prevent further damage to the appliance.
One of the most common issues with a Kitchenaid dryer is when it fails to heat up, leaving you with damp clothes. This can be frustrating, especially if you rely heavily on your dryer. In this section, we’ll explore the possible causes of a Kitchenaid dryer not heating, including a faulty heating element, malfunctioning thermostat, and defective thermal fuse. Faulty Heating Element A faulty heating element is the most common cause of a Kitchenaid dryer not heating. When the heating element fails, the dryer won’t be able to generate heat, and your clothes will remain wet. The heating element is responsible for heating the air that circulates through the drum, and if it’s damaged or broken, it won’t be able to do its job. Malfunctioning Thermostat Another possible cause of a Kitchenaid dryer not heating is a malfunctioning thermostat. The thermostat regulates the temperature inside the dryer, and if it fails, it won’t be able to communicate with the heating element to produce heat. Sometimes, the thermostat may also be stuck in the closed position, which prevents it from sending the signal to the heating element. Defective Thermal Fuse If your Kitchenaid dryer is still not heating up, there may be a problem with the thermal fuse. The thermal fuse is designed to shut off the dryer when it starts to overheat. It’s an essential safety feature that prevents fires, but if it’s defective or blown, the dryer won’t heat up at all. The thermal fuse is located on the blower housing and can be easily replaced. In conclusion, a Kitchenaid dryer not heating up can be due to a few common issues like a faulty heating element, malfunctioning thermostat, and defective thermal fuse. By knowing the possible causes, you can troubleshoot and fix the problem quickly, ensuring that your dryer runs smoothly again.How To Troubleshoot The Problem
Is your Kitchenaid dryer not heating up? Try checking the thermal fuse, heating element, and thermostat to identify the issue. Clean out any excess lint and ensure the ventilation system isn’t blocked. Consider seeking professional help if troubleshooting does not restore heat.
If you own a Kitchenaid dryer, you might have encountered an issue where it’s not heating up. This can be frustrating, especially when you need to dry your clothes. However, before you panic and call a technician, try these troubleshooting steps to identify and fix the problem yourself.Check The Power Supply
The first thing to check is if your dryer is getting power. Make sure it’s plugged into a working outlet and that the circuit breaker hasn’t tripped. If the circuit is tripped, reset it and turn the dryer on again. Also, make sure the door of the dryer is closed properly as it won’t start if the door is open.Examine The Heating Element
If your dryer is still not heating up, the heating element might be damaged. Check the heating element by disconnecting your dryer from the power source and finding the heating element location. You can refer to the user manual to locate it. Use a multimeter to check the element’s resistance. If the multimeter reads “infinity,” it means the heating element is faulty, and you need to replace it.Test The Thermostat
If the heating element is functional, the issue might lie with the thermostat. A damaged thermostat can prevent the dryer from producing heat. To check the thermostat’s functionality, you need to use a multimeter to test its continuity. If the thermostat doesn’t have continuity, it needs to be replaced.Inspect The Thermal Fuse
The thermal fuse can also prevent the dryer from heating up. It’s a safety device that shuts the dryer down in case of overheating. If the dryer’s thermal fuse is faulty, you need to replace it. To check the thermal fuse, disconnect the dryer from the power source, and use a multimeter to test its continuity. If you’ve tried all these steps, and your Kitchenaid dryer is still not heating up, it’s time to call a professional for assistance. By following these simple steps, you can save on the cost of the repair and also maintain the functionality of your dryer.Tools Needed For The Job
To fix a Kitchenaid dryer not heating, you’ll need some tools. You’ll need a multimeter, screwdrivers, pliers, and a thermal fuse kit. These tools will help you troubleshoot and fix common dryer heating problems.
If your KitchenAid dryer is not heating up, then it’s time to roll up your sleeves and tackle the issue yourself. However, before you begin with repairing the dryer, you must have the right tools in hand. In this section, we’ll discuss the essential tools that you need to get the job done.Multimeter
The first and the most important tool that you’ll need is a multimeter. It is a device that measures electrical currents, voltage, and other electrical parameters. With the help of a multimeter, you can quickly check if any of the dryer’s components are receiving power.Screwdriver
Another necessary tool is a screwdriver. You’ll need it to open up the dryer’s cabinet and access its various parts. A screwdriver with a magnetic tip would be ideal, as it can hold the screws in place while you work. To access the heating element, thermal fuse, and thermostats, you have to take apart the dryer. And that’s where the screwdriver will come in handy.Other Tools
Apart from a multimeter and a screwdriver, you might also need a few other tools, depending on the issue with your KitchenAid dryer. These tools include:- A nut driver set
- Tweezers
- An electrician’s tape
- An oven thermometer
Credit: authorizedco.com
How To Replace The Heating Element
To replace the heating element in your Kitchenaid dryer, first unplug it and remove the back panel. Locate the element and disconnect the wires. Take out the old element and replace it with the new one, reconnecting the wires firmly before putting the panel back on.
Replacing a Kitchenaid dryer heating element can be a daunting task, but it is something that you can do yourself. In this guide, we’ll break down the steps and provide detailed instructions on how to replace the heating element. Follow along to fix your Kitchenaid dryer not heating issue.Unplug The Dryer
The first step in replacing a heating element in your Kitchenaid dryer is to unplug the machine. This is a crucial step, as working on an appliance with the power on can be extremely dangerous. Take the time to locate the plug and disconnect it from the outlet before moving forward.Locate The Heating Element And Disconnect It
Once you have safely unplugged your dryer, locate the heating element. It is usually found on the back, inside wall of the dryer. Depending on the model, you may need to remove the back cover or the top of the dryer to access it. Once you have located it, carefully remove any wires or connectors that are attached to it. It’s important to remember how the wires are connected, so you can reattach them properly once the new heating element is installed.Remove The Old Heating Element And Install The New One
With the old heating element disconnected, it’s time to remove it from the dryer. You may need to unscrew or unclip it from its housing to remove it entirely. Once the old heating element is out of the way, it’s time to install the new one. Carefully slide the new heating element into place and secure it in its housing. Be sure to double-check the placement and connections before continuing.Reconnect The Wires And Test The Dryer
The final step in replacing your Kitchenaid dryer heating element is to reconnect all of the wires as they were before. Take the time to ensure each wire is securely connected to its matching point. Once everything is connected, you can test your dryer to ensure the new heating element is working properly. In summary, replacing the heating element in your Kitchenaid dryer is a task that you can do yourself. Follow these simple steps to safely and effectively replace your dryer heating element.How To Replace The Thermostat
To replace the thermostat on your Kitchenaid dryer that’s not heating, start by unplugging the dryer and locating the thermostat. Remove the old thermostat and install the new one, making sure all wires are connected securely before testing the dryer.
How to Replace the Thermostat? If your Kitchenaid dryer isn’t heating, the thermostat could be the culprit. Replacing it is a fairly simple process that doesn’t require specialized skills. Here, we’ll outline the steps you need to take to replace a faulty thermostat.Unplug The Dryer
Before you start, make sure the dryer is unplugged so you don’t risk getting an electric shock. Don’t just turn it off, unplug it from the wall socket.Find The Thermostat And Disconnect It
The thermostat is usually located on the blower housing or burner assembly. Check your user manual for the specific location. Once you’ve located the thermostat, disconnect the wires from it. You may need to use pliers or a screwdriver to remove the connectors.Replace The Old Thermostat With A New One
Remove the old thermostat carefully. To install the new thermostat, read the manufacturer’s instructions carefully. You may need to insert a new insulator between the new thermostat and the mounting bracket. Follow the instructions to install the new thermostat and be sure to tighten it securely in place.Reattach The Wires And Test The Dryer
Reconnect the wires to the new thermostat, making sure you attach them to the correct connectors. Make sure you plug the dryer back in and turn it on. If you did everything correctly, the dryer should start to heat up. If it doesn’t, double-check your connections and refer to the manual. That’s it! Replacing the thermostat is a straightforward process that should only take you about an hour or less. If you’re not confident doing it yourself, you can always call in a professional. But if you follow the steps we’ve outlined, you’ll be able to do it yourself with ease.How To Replace The Thermal Fuse
Replace the thermal fuse of your Kitchenaid dryer to fix the issue of not heating. First, unplug the dryer and remove the back panel to locate the fuse. Replace the blown fuse with a new one and reattach the back panel.
If your Kitchenaid dryer isn’t heating up properly, a faulty thermal fuse could be to blame. But no need to worry, replacing the thermal fuse is something you can easily do on your own. Here’s a step-by-step guide on how to replace the thermal fuse on your Kitchenaid dryer.Unplug The Dryer
The very first thing you should do is unplug your dryer from the power source. This is very important to ensure your safety and prevent electrical shock.Access The Thermal Fuse
Once your dryer is unplugged, you’ll need to locate the thermal fuse. In most cases, it is located on the blower housing, behind the back panel of your dryer. You will need to remove the back panel by unscrewing the screws, to access the thermal fuse.Disconnect The Old Thermal Fuse
After you have accessed the thermal fuse, you need to disconnect it from the wiring harness. Simply pull the wires away from the terminal of the old thermal fuse. If the wires are firmly attached, use pliers to gently pull them off the thermal fuse terminals.Install The New Thermal Fuse And Reconnect The Wires
Now that you’ve removed the old thermal fuse, it’s time to install the new one. Attach the wires to the new thermal fuse terminals, then secure the thermal fuse to the blower housing with its mounting screw or clip. Replace the back panel, screw it in place, and plug the dryer back in.Conclusion
By following these simple steps, you can easily replace the thermal fuse on your Kitchenaid dryer. Make sure to regularly clean your dryer’s lint filter and exhaust duct to avoid overheating and keep your appliance running efficiently. If the problem persists after replacing the thermal fuse, it may be time to call a professional technician for further assistance.When To Call A Professional
Experiencing a Kitchenaid dryer not heating up can be frustrating, but before attempting any DIY repairs, it’s important to know when to call a professional. A certified technician can accurately diagnose the issue and offer safe and effective solutions, preventing any further damage to your appliance.
If your Kitchenaid Dryer is not heating up, it can be a frustrating experience as it can lead to incomplete drying of clothes. While it may be tempting to fix the issue yourself, calling a professional may be the best option in certain cases. Here are a few things to keep in mind when deciding whether to call a professional or not.If The Problem Persists After Troubleshooting
If you’ve tried basic troubleshooting steps, such as cleaning the lint filter, checking the vent and thermostat, and resetting the breaker, and you still find your Kitchenaid Dryer not heating, it could be time to call in a professional. A licensed repair technician will have the necessary tools and expertise to diagnose the issue and fix the problem.If You Are Not Comfortable With Diy Repairs
If you’re not someone who is comfortable with DIY repairs, it’s best to avoid trying to fix your Kitchenaid Dryer yourself. Attempting repairs without the proper knowledge or experience can make the problem worse, and it may lead to additional repair costs in the long run. Therefore, it’s always better to hire a professional for the job.In Conclusion,
Having a Kitchenaid Dryer not heating up can be a frustrating experience. However, you don’t have to worry too much as there are professionals available who can fix the problem for you. It is always a good idea to have a professional take a look at the problem if the basic troubleshooting steps do not work or if you are not comfortable with DIY repairs. By working with a professional, you can be assured that your appliance will be repaired correctly and efficiently.Preventing Future Problems
If your Kitchenaid dryer is not heating, it’s important to take preventative measures to avoid future problems. Check for clogs or damage in the venting system and ensure the thermostat and heating element are functioning properly. Regular maintenance can save you time and money in the long run.
Preventing future problems is an essential consideration when dealing with a KitchenAid dryer that doesn’t heat. While attempting to fix the problem, it is imperative to ensure that the current one doesn’t arise again in the future. The good news is that with proper maintenance, most issues with non-heating dryers can be prevented. Regularly clean the lint filter and exhaust vent: One of the leading causes of non-heating dryers is a clogged dryer vent or lint filter. Lint can build up in and around the vents, causing the dryer to overheat and shut down. To prevent this problem, regularly clean the lint filter and exhaust vent. Remove the lint from the filter after every drying cycle, and check the vent for lint buildup at least once every three months. Have your dryer serviced annually: It is always a good idea to have your dryer serviced annually by a professional technician. During the service, the technician will inspect and clean the various components of the dryer, including the heating element, thermostat, and internal sensors. This will help detect any potential problems and address them before they escalate into costly repairs. It also ensures that your dryer runs efficiently, saving energy and money on electricity bills. In conclusion, by following these preventive measures, you can keep your KitchenAid dryer running smoothly, avoiding non-heating issues in the future. Regularly cleaning the lint filter and exhaust vent and having your dryer serviced annually by a professional technician are crucial steps in maintaining the functionality of your dryer. These steps can add years to the lifespan of your dryer, minimize energy consumption, and save you money in the long run.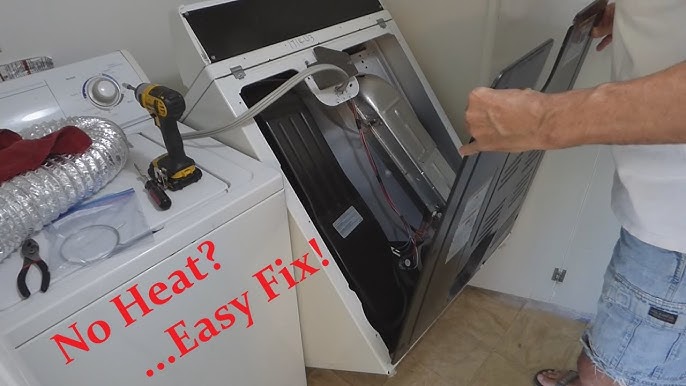
Credit: www.youtube.com
Conclusion
After trying out the possible solutions mentioned in this blog post on how to fix a Kitchenaid dryer that’s not heating, it’s important to keep in mind that certain pre-cautions can prevent your dryer from malfunctioning. Regular cleaning, checking the circuit breaker, and inspecting the vents can help extend the life of your dryer.
However, if the problem persists, it’s best to seek professional help. With the right maintenance and prompt attention to any issues that arise, you can keep your Kitchenaid dryer running smoothly for years to come.