
A malfunctioning Samsung dryer can disrupt your daily routine, leaving clothes damp and schedules in disarray. The Samsung Dryer Model DV40J3000EW/A2 is a popular electric dryer known for its reliable performance, but like any appliance, it can encounter issues over time. Understanding common problems and how to troubleshoot them can save you time, money, and unnecessary service calls.
This comprehensive guide walks you through diagnosing and resolving the most frequent issues with your Samsung DV40J3000EW/A2 dryer. From power failures and heating problems to unusual noises and display malfunctions, we’ll help you identify the root cause and provide actionable solutions. Always consult your user manual for model-specific details, and remember to disconnect power before performing any inspections or repairs.
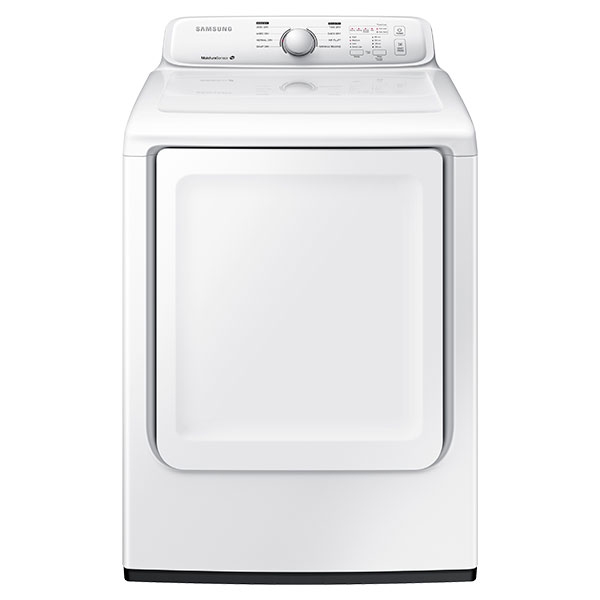
Credit: www.samsung.com
Dryer Won't Start
When your Samsung dryer refuses to start, the issue often lies in basic electrical connections or safety mechanisms. Addressing these components systematically can restore functionality without professional intervention.
Power Supply Verification
First, ensure the dryer is receiving proper electrical power:
- Check the power cord: Confirm it's securely plugged into a dedicated 240-volt outlet. A loose or disconnected cord is a common oversight.
- Inspect the outlet: Test the outlet with another high-wattage appliance to verify it's operational. If the outlet lacks power, reset the circuit breaker or consult an electrician.
- Examine the power cord: Look for visible damage such as fraying, cuts, or exposed wires. damaged components require immediate replacement.
Always disconnect the dryer from power before inspecting internal components. For complex electrical issues, professional assistance ensures safety and compliance with NFPA 70 National Electrical Code standards.
Door Switch Inspection
The door switch prevents operation when the door isn't fully closed—a critical safety feature. If malfunctioning, the dryer won't start even with the door shut.
To test the door switch:
- Unplug the dryer and remove the console panel to access the switch near the door frame.
- Use a multimeter set to continuity mode. Place probes on the switch terminals.
- Close the door manually (or simulate closure with a tool). The meter should indicate continuity (zero ohms).
- If there’s no continuity when the door is closed, replace the switch immediately.
A faulty door switch not only prevents startup but can also pose safety risks during operation.
Start Switch Testing
Located on the dryer’s control panel, the start switch initiates the motor and drum rotation. Over time, mechanical wear or electrical faults can render it ineffective.
Steps to diagnose the start switch:
- Disconnect power and remove the console to access the switch.
- Remove the switch wiring harness and test continuity with a multimeter.
- Press the switch actuator while measuring resistance. A functioning switch shows continuity when pressed.
- Replace the switch if no continuity is detected.
For detailed guidance on similar issues across different brands, explore our LG dryer troubleshooting resources to broaden your understanding of common dryer problems.
Credit: www.samsung.com
Dryer Drum Won't Turn
A non-rotating drum renders the dryer ineffective. Identifying whether the culprit is mechanical (belt/motor) or structural (rollers) helps determine repair complexity.
Drive Belt Check
The drive belt connects the motor to the drum pulley, enabling rotation. A broken or slipped belt halts drum movement entirely.
Inspection process:
- Disconnect power and remove the dryer’s top and front panels.
- Visually examine the belt for cracks, fraying, or breaks.
- Press down on the belt midway between pulleys. Excessive give indicates wear or improper tension.
- Rotate the drum manually. Binding or resistance suggests bearing issues beyond the belt itself.
Replace the belt promptly upon detecting damage. While DIY replacement is feasible, aligning the belt correctly requires care to avoid premature failure.
Drive Motor Diagnosis
The drive motor powers both the drum and blower assembly. Symptoms pointing to motor failure include:
- Complete silence during startup attempts
- Burn smell emanating from the motor housing
- Grinding or humming sounds without drum movement
To test the motor:
- Access the motor located at the dryer’s base.
- Check for loose connections or debris obstructing airflow.
- Test windings with a multimeter for continuity between terminals and ground.
If testing reveals internal open circuits or shorts, professional replacement is strongly advised due to the motor’s critical role and risk of misinstallation.
Drum Roller Evaluation
Drum rollers support the drum’s weight and facilitate smooth rotation. Worn rollers create noise and uneven movement, potentially damaging the drum over time.
Signs of roller failure:
- Thumping or rumbling noises during operation
- Noticeable wobble when rotating the drum by hand
- Visible grooves or flat spots on roller surfaces
Each roller should rotate freely without binding. Lubricate lightly with manufacturer-approved grease during inspection; however, persistent issues warrant roller replacement in pairs for balanced operation.
For additional tips on maintaining optimal dryer performance, refer to our article on LG dryer heating problems which covers shared components found in many electric dryers.
Dryer Not Heating Properly
Heating problems fall into two categories: insufficient heat or excessive heat. Both affect drying efficiency and require targeted troubleshooting approaches.
Heating Element Replacement
Electric dryers rely on heating elements to generate warmth. A burned-out element results in cold air blowing through the drum.
Diagnostic steps:
- Disconnect power and remove the rear panel to access the heating element assembly.
- Inspect coils for visible damage like breaks or discoloration.
- Remove wires and test continuity using a multimeter.
- Zero or infinite readings confirm element failure; replace accordingly.
Avoid touching new elements with bare hands to prevent oil contamination that could lead to early burnout.
Thermostat Function Testing
Thermostats regulate internal temperature by cycling the heating element on and off. Malfunctioning thermostats disrupt this balance, causing either overheating or inadequate heating.
Types encountered:
| Thermostat Type | Location | Failure Impact |
|---|---|---|
| High-Limit Thermostat | Near heating element | Triggers shutdown at extreme temps |
| Cycling Thermostat | On blower housing | Regulates ongoing heat output |
| Radiant Thermostat | Above heat chamber | Responds to direct flame contact |
Test each thermostat for continuity using a multimeter. Replace only after confirming failure through precise measurement rather than guesswork.
Thermal Fuse Monitoring
Thermal fuses act as failsafe devices, cutting power to the heating circuit if temperatures exceed safe thresholds. Once blown, they don’t reset and must be replaced.
Location typically near the exhaust housing or blower wheel. To check:
- Locate the thermal fuse attached to the dryer chassis.
- Disconnect wires and measure resistance across terminals.
- Infinite resistance confirms a blown fuse requiring replacement.
Crucially, never bypass a blown thermal fuse—this compromises fire safety. Also inspect connected ductwork for blockages contributing to repeated overheating incidents. Learn more about airflow-related concerns in our guide on clearing LG D80 codes.
Unusual Noises During Operation
Noises emanating from your Samsung DV40J3000EW/A2 can signal component wear or misalignment. Prompt attention prevents escalation into costlier repairs.
Drum Roller Noise
Thumping or rhythmic knocking usually stems from degraded drum rollers. As rubber accumulates dirt or hardens with age, vibration increases dramatically.
Remedy involves removing the drum to inspect each roller individually. Replace worn units in matched sets to maintain uniform load distribution.
Bearing Wear Detection
Squeaks or metallic scraping point toward rear drum bearings nearing end-of-life. These sealed bearings rarely fail suddenly—they exhibit progressive deterioration marked by increasing noise intensity.
Early indicators:
- High-pitched squeal during startup
- Rough texture when spinning drum by hand
- Visible rust spots around bearing housing
Professional servicing recommended due to intricate disassembly required. Improper handling risks permanent drum damage.
Idler Pulley Maintenance
Squealing sounds often originate from insufficient tension in the idler pulley system. The pulley maintains constant pressure against the drive belt, ensuring proper tracking.
Maintenance routine:
- Remove drive belt for unrestricted pulley access.
- Spin pulley by hand—listen for grinding or roughness.
- Apply penetrating lubricant sparingly if movement feels sticky.
- Tighten mounting bolt securely post-lubrication.
Persistent noise despite lubrication implies bearing replacement within the pulley assembly.
Compare these findings with documented cases involving LG CL code blink patterns to understand how sensors interact with mechanical subsystems.
Clothes Remaining Damp After Cycle Completion
Ineffective moisture removal plagues numerous households. Root causes span from routine maintenance oversights to advanced sensor calibration errors.
Lint Filter Effectiveness
Clogged lint filters drastically reduce airflow, extending cycle times significantly. Residue buildup isn’t always visible—even clean-looking filters can harbor unseen particles reducing permeability.
Effective cleaning method:
- Remove filter weekly and brush away trapped lint particles.
- Wash monthly using warm water mixed with mild detergent.
- Rinse thoroughly and allow complete air drying before reinstalling.
Never operate the dryer with a damp or partially installed filter—fire hazards escalate rapidly under restricted airflow conditions.
Ventilation System Integrity
Blocked exhaust vents mimic symptoms of failing heating systems. Airborne moisture escapes via rigid metal ducting terminating safely outdoors. Any restriction impedes vapor evacuation.
Common obstructions:
- Bird nests accumulated over seasons
- Frozen condensation in winter climates
- Kinked flexible hoses crushed by furniture placement
Annual professional cleaning using rotary brushes restores unrestricted passage flow rates essential for optimal performance. DIY enthusiasts may utilize leaf blowers cautiously—but avoid pressurizing indoor spaces accidentally.
Explore further insights regarding duct design considerations outlined in our discussion covering LG washer-dryer CD error resolutions.
Sensor Calibration Adjustments
Modern Samsung models incorporate moisture sensors detecting fabric dampness levels automatically adjusting cycle durations. When sensors accumulate oils or detergent residue, false readings trigger premature shutdowns.
Calibration procedure varies slightly depending on firmware version but generally includes:
- Running empty cycles to recalibrate baseline readings.
- Cleaning sensor strips with rubbing alcohol-soaked cloth.
- Avoiding fabric softener sheets which coat sensors chemically.
Refer explicitly to technical bulletins issued by Samsung support teams for exact sequences applicable to your unit’s software build.
Dryer Shutting Off Prematurely
Unexpected terminations frustrate users expecting full-length cycles. Investigate root triggers behind erratic behavior before assuming hardware faults dominate.
Moisture Sensor Malfunctions
As previously noted, dirty or damaged moisture sensors contribute directly to intermittent shutdowns. Even minor contamination alters conductivity enough to fool control logic into terminating cycles early.
Symptoms correlating with sensor degradation:
- Inconsistent final dampness states among load sizes
- Error displays mentioning “sensor error”
- Premature stops averaging fewer minutes than programmed cycles
Cleaning protocols involve accessing lower drum areas where sensors sit exposed. Alcohol-based cleaners dissolve sticky residues effectively—but ensure full evaporation prior to reoperation.
Control Board Instability
The main control board governs timing relays, heating sequences, and user interface responsiveness. Occasional reboots manifest as brief blackouts followed by spontaneous restarts mimicking intentional pauses.
Indicators pointing toward board-level dysfunction:
- Delayed response to button presses
- Random resetting mid-cycle without warning
- Persistent display glitches unrelated to input commands
Resetting the entire system offers temporary relief but recurring events necessitate board evaluation. Given rising labor costs associated with diagnostics, replacing suspect boards proactively saves aggregate expense long-term.
Consult our breakdown of typical LG error code interpretations to distinguish between recoverable anomalies versus irrecoverable failures demanding expert intervention.
Overheating Conditions Observed
Excessive heat generation threatens both appliance longevity and household safety. Immediate corrective actions minimize fire risks linked to uncontrolled thermal escalation.
Thermostat Responsiveness
Cycling thermostats govern steady-state temperatures within acceptable ranges. Aging contacts develop oxidation layers insulating conductive pathways ultimately disabling feedback loops crucial for regulation.
Verification entails removing thermostatic switches and checking continuity under varying load conditions. Functional units toggle closed circuits periodically whereas faulty ones remain perpetually engaged or disconnected.
Replacement part numbers must match original specifications exactly—incompatible substitutes introduce unpredictable behaviors compromising core safety functions.
Ventilation Blockage Impact
Overloaded vent lines restrict outbound airflow creating back-pressure buildup forcing ambient air stagnation increasing overall operating temperatures unnaturally.
Recommended actions:
- Fully disconnect exhaust piping annually.
- Blowout accumulated debris using compressed air supply.
- Inspect elbows and transitions for collapsing deformations impeding flow.
Persistent overheating post-cleaning indicates deeper systemic issues possibly involving flame sensors or limit controls requiring bench testing beyond scope of basic homeowner capabilities.
Our analysis detailing procedures for diagnosing LG TE1 error occurrences provides supplementary context relevant to broader heating dynamics present across multiple platforms.
Display Panel Issues
Flickering LEDs, blank screens, or unresponsive touchpads indicate potential interface malfunctions disrupting usability altogether.
Power Delivery Consistency
Ensure stable voltage supply reaching control circuits. Fluctuating currents induce erratic behavior manifesting visually through erratic lighting effects inconsistent with normal operational parameters.
Verify incoming voltage stabilizers function adequately especially during peak utility demand periods coinciding with simultaneous appliance usage elsewhere in residence.
Internal Component Failures
Capacitor banks smoothing DC rails degrade gradually over years losing capacitance capacity resulting in intermittent signal dropout affecting display drivers directly.
Symptoms suggestive of capacitor aging:
- Delayed screen activation following power restoration
- Ghost images lingering momentarily after selections change
- Audible clicking emanating from rear compartments
Component-level repairs demand soldering proficiency coupled with ESD precautions minimizing collateral damage risks posed by static discharge events occurring unpredictably throughout manipulation processes.
Should difficulties persist beyond basic troubleshooting steps, engage certified technicians equipped with specialized diagnostic tools capable of isolating obscure faults invisible to amateur investigators.
Review additional strategies discussed in our overview of managing LG dryer CL-code scenarios for complementary perspectives applicable across diverse makes and models.
Frequently Asked Questions
### Why does my Samsung DV40J3000EW/A2 shut off mid-cycle?
Premature shutdowns typically relate to moisture sensor contamination, faulty thermostats, or clogged ventilation pathways interrupting proper airflow regulation. Start by cleaning accessible components externally before advancing toward deeper diagnostic measures requiring multimeters or professional assessments.
### What causes the dryer to run but produce no heat?
Check for blown thermal fuses, failed heating elements, or disconnected wiring harnesses leading to open circuits interrupting current flow necessary for resistive heating generation within enclosed chambers. Visually inspect exposed components looking for charring, breaks, or loose fastenings indicative of recent component failures.
### Is it safe to bypass the thermal cutoff in my Samsung dryer?
Absolutely not. Bypassing thermal protection mechanisms eliminates critical safeguards designed to prevent runaway temperatures risking fire hazards. Replace faulty components outright instead pursuing risky shortcuts violating manufacturer safety guidelines and potentially voiding warranty coverage altogether.
### How frequently should I clean the exhaust vent on my Samsung dryer?
Industry best practices recommend annual professional-grade cleaning supplemented by monthly homeowner visual inspections confirming unrestricted airflow passage. More frequent attention becomes necessary whenever noticeable reductions in drying speeds occur suggesting partial blockages accumulating gradually unnoticed until performance suffers measurably.
### Can I repair a broken dryer belt myself?
Yes, provided you possess basic hand tool familiarity and willingness to follow detailed disassembly instructions carefully. Ensure replacement belts match exact OEM specifications regarding length, width, and tooth configuration to guarantee compatibility and prevent premature reoccurrence of initial symptoms necessitating repeat interventions shortly thereafter.
### What should I do if the control panel becomes unresponsive?
Begin by verifying secure electrical connections behind unit followed by attempting hard reset procedure involving unplugging device for minimum thirty-second interval allowing capacitors to discharge fully resetting integrated circuit configurations stored internally. Continued malfunction beyond this stage warrants formal diagnostic scan revealing underlying firmware corruption necessitating authorized service center involvement.
Conclusion
Troubleshooting your Samsung DV40J3000EW/A2 need not involve immediate panic or costly technician visits. Armed with knowledge of common failure modes and logical diagnostic pathways, many users successfully resolve minor inconveniences independently while identifying situations warranting trained expertise intervention.
Regular maintenance routines like cleaning lint traps, inspecting exhaust ducts, and monitoring unusual sounds preserve long-term reliability while safeguarding against preventable breakdowns undermining daily convenience expectations homeowners reasonably expect from modern appliances.
When challenges transcend basic capabilities, don’t hesitate reaching out to reputable repair services specializing in Samsung products carrying appropriate certifications validating competence handling sophisticated electronic assemblies safely and efficiently. Remember, proactive care extends equipment lifespan far exceeding initial investment returns realized through minimized downtime interruptions experienced otherwise.