
Why The Thermal Fuse Matters For Your Speed Queen Dryer
The thermal fuse is a small but vital safety component in every Speed Queen dryer, designed to cut power to the heating element if exhaust temperatures climb too high. When it fails, your dryer won’t start or heat at all—a frustrating but preventable issue that often stems from restricted airflow rather than the fuse itself wearing out.
Introduction To Speed Queen Dryers
Speed Queen builds commercial-grade laundry equipment known for durability and straightforward repairability. Unlike many residential brands that hide components deep inside cabinets, Speed Queen designs often provide relatively easy access to key parts like the thermal fuse, blower housing, and heating assembly. For more on this, see our guide on top 7 best price on speed queen washer.
Common Model Series And Layout Differences
Different Speed Queen model lines place the thermal fuse in slightly different locations:
| Model Line | Typical Fuse Location | Access Method |
|---|---|---|
| TR-Series Residential | Blower housing or exhaust elbow | Rear panel removal |
| DR Series (Front Load) | Heating element housing | Lower front panel |
| Commercial Coin-Op | Exhaust duct junction | Top panel lift + rear access |
Always consult your specific model number (found here) to confirm the exact location before beginning any disassembly.

How A Thermal Fuse Works
A thermal fuse contains a heat-sensitive pellet or bimetallic strip that permanently breaks an electrical circuit when exposed to excessive temperatures. These devices are non-resettable—once tripped, they must be replaced. For more on this, see our guide on best 3 speed hair dryer.
This differs from a thermal cutoff (which may reset) or a high-limit thermostat (which resets automatically). Confusing the two is a common mistake that leads to unnecessary part replacements.
Signs Your Thermal Fuse Has Blown
Dryer Won’t Start At All
If pressing the start button produces no response—even though the door closes properly and the control panel powers on—it’s likely the thermal fuse has opened the main power circuit.
No Heat During Drying Cycle
While less definitive than a complete failure, lack of heat can also point to a blown thermal fuse, especially if airflow feels weaker than usual.
Intermittent Shutdowns
Some users report the dryer starting normally but shutting down mid-cycle without warning—a symptom worth investigating if other causes like vent blockages have been ruled out.
Locating The Thermal Fuse On Most Models
Safety First
Before touching anything inside the dryer:
- Unplug the unit from the wall outlet or turn off the circuit breaker.
- Wait 30 minutes for internal capacitors to discharge.
- Work in a well-lit area with slip-resistant gloves.
Access Points By Model Type
Rear Access Dryers (Most TR Models)
Remove the two retention screws securing the back panel, then slide it downward and lift away. The thermal fuse sits near the blower wheel housing and connects via two thin wires.
Front Access Dryers (DR Series)
Open the lower front service panel by removing screws along the bottom edge. The fuse is typically mounted directly above the heating element housing.
Commercial Units (AES Series)
Lift the top panel using gas struts or hinges, then remove the rear access cover. Look for the fuse where the exhaust tube connects to the blower assembly.
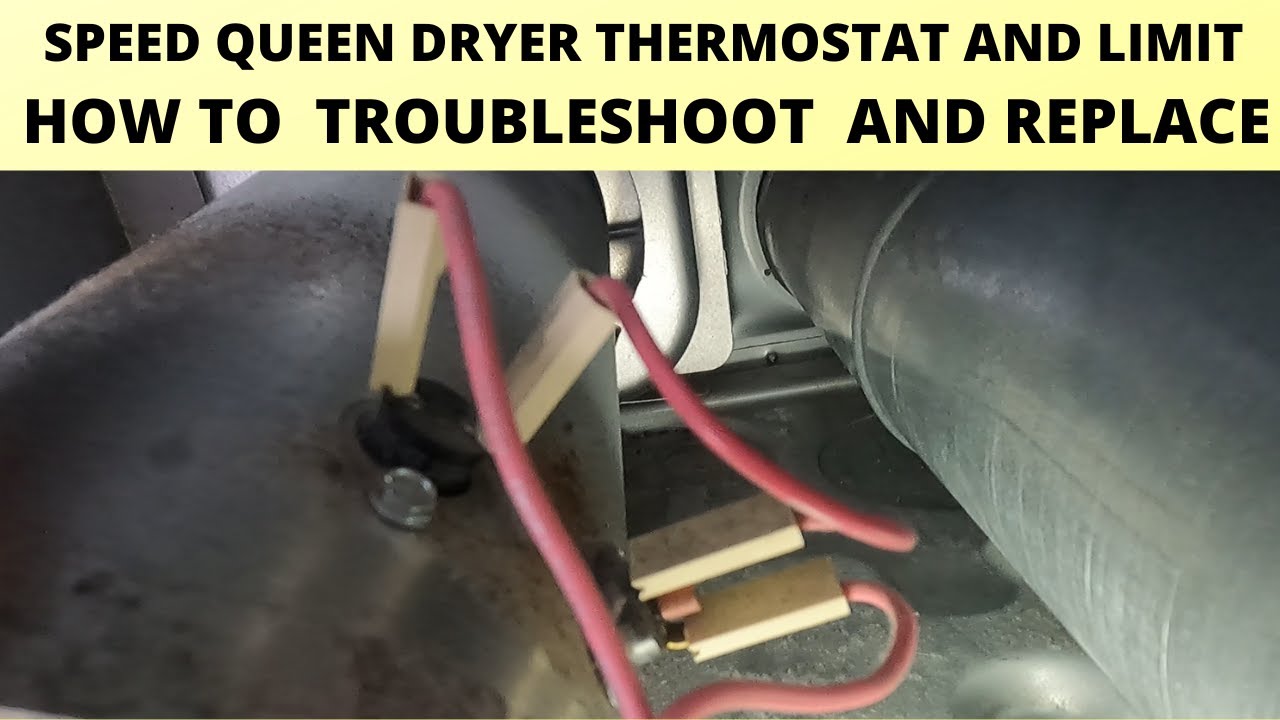 Image source: m.youtube.com
Testing And Replacing The Thermal Fuse
Tools You’ll Need
| Tool | Purpose |
|---|---|
| Phillips head screwdriver | Panel removal |
| Flathead screwdriver | Wire disconnection |
| Digital multimeter | Continuity testing |
| Replacement thermal fuse | Part-specific to your model |
Step-by-Step Instructions
- Disconnect power completely before proceeding.
- Locate the fuse using your model manual or guide above.
- Test continuity: Set your multimeter to ohms mode and touch probes to each terminal. A reading between 0–1 ohm indicates a good fuse; infinite resistance means it’s blown.
- Remove old fuse: Carefully pull wire connectors off terminals.
- Install new fuse: Connect wires securely and fasten mounting screws.
- Reassemble panels and restore power.
- Run test cycle to confirm normal operation.
Never bypass a thermal fuse—it exists to protect against fire hazards. Doing so violates UL safety standards and voids warranties.
Preventing Future Failures
Clean Vent System Regularly
A clogged lint screen or exterior vent hose forces hot air to recirculate, pushing temperatures beyond safe limits and triggering repeated fuse failures. Clean screens after every load and inspect ductwork twice yearly.
Monitor Airflow Performance
Weak airflow during drying cycles suggests partial blockage elsewhere in the system. Consider professional cleaning if clothes take significantly longer to dry than normal.
Schedule Annual Maintenance Checks
If your dryer sees heavy use—especially in shared laundry rooms—annual inspection catches wear patterns early. For instance, testing airflow properly prevents costly surprises later.
 Image source: m.youtube.com
When To Call A Professional Technician
DIY replacement saves money, but certain red flags warrant expert attention:
- Repeated blowing within weeks despite proper installation.
- Evidence of scorch marks near heating elements or wiring harnesses.
- Control panel malfunctions unrelated to physical damage.
For complex diagnostics involving circuit boards or motor assemblies, certified technicians bring both safety expertise and warranty coverage. Learn more about common Speed Queen issues like D80 error codes to distinguish between simple maintenance needs and deeper electrical faults.
Frequently Asked Questions About Speed Queen Thermal Fuses
Where Is The Thermal Fuse Located On A Speed Queen Dryer?
It varies by model, but typically resides on the blower housing, heating element shroud, or exhaust duct elbow. Access depends on whether the dryer uses rear or front-loading panels.
What Causes A Thermal Fuse To Blow Repeatedly?
Restricted airflow—from dirty lint filters, blocked vents, or failing blowers—is the most frequent culprit. Replacing the fuse alone without addressing root causes guarantees another failure soon.
Can I Bypass A Blown Thermal Fuse Temporarily?
Absolutely not. Bypassing removes essential fire protection. Even temporary operation poses serious risks including property damage and personal injury.
Is There A Reset Button For A Thermal Fuse?
No. Thermal fuses are single-use devices meant to fail safely when overheated. Unlike thermostats, they cannot be reset and must always be replaced.
Do All Speed Queen Dryers Use The Same Thermal Fuse?
Each model requires a specific replacement part matched to voltage, amperage ratings, and mounting configuration. Using incompatible substitutes risks improper function or unsafe operation.
Final Thoughts On Finding And Fixing Your Thermal Fuse
Knowing where your Speed Queen thermal fuse lives empowers confident troubleshooting—but remember, locating it is only half the battle. Proper diagnosis through multimeter testing and attention to underlying airflow issues ensures lasting results.
Whether tackling the job yourself or calling a technician, prioritizing safety and accuracy keeps your appliance performing reliably year after year. For ongoing care tips, explore resources covering dryer error code interpretation and routine maintenance schedules tailored to commercial-grade equipment.