
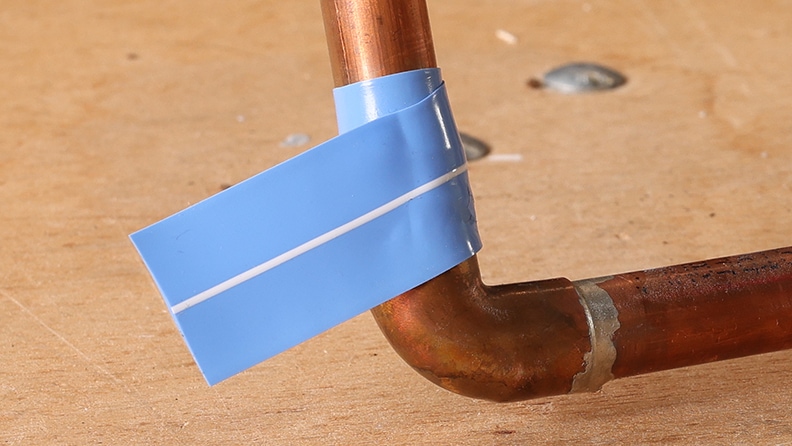
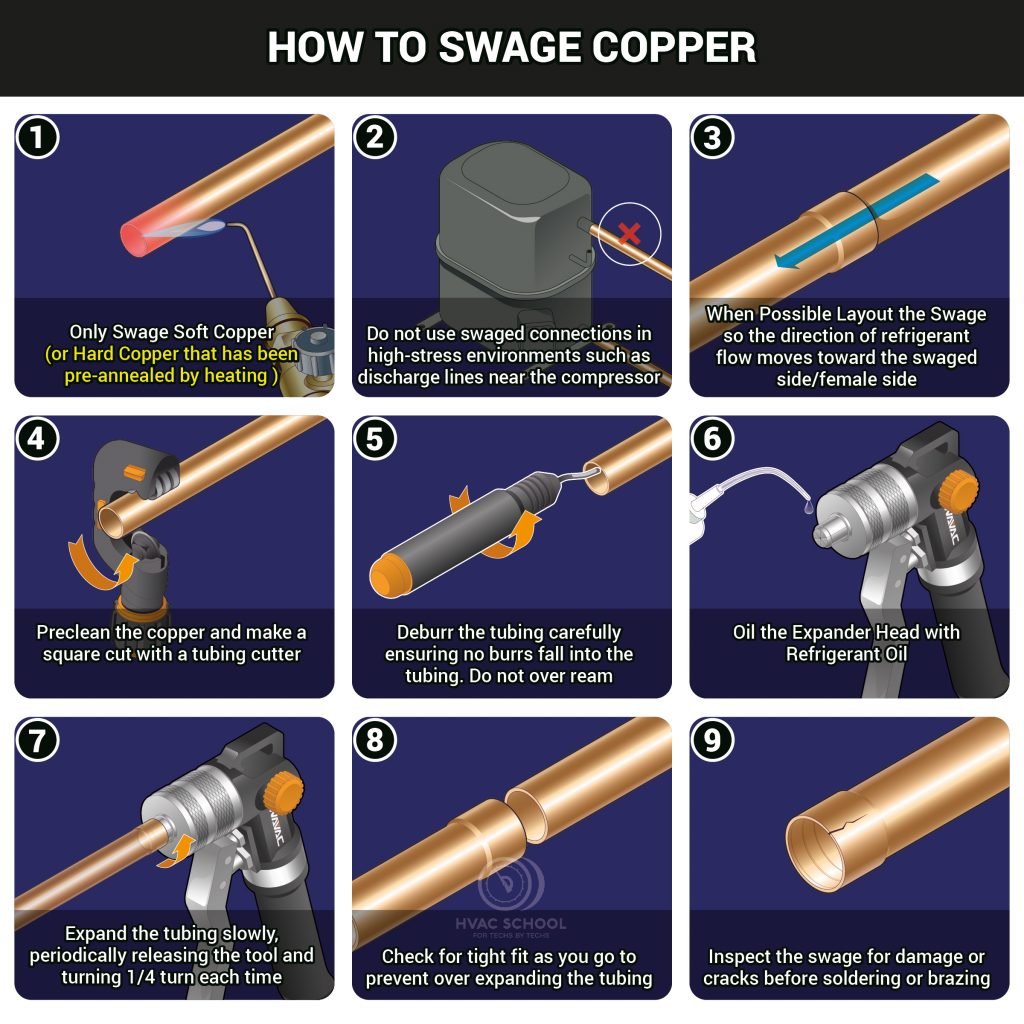
To fix a slow leak in an HVAC connection, first locate the leak and then apply the appropriate sealant. Tighten any loose connections to ensure a secure fit.
A slow leak in your HVAC system can lead to inefficiency and higher energy bills. Regular maintenance and timely repairs are crucial for optimal performance. Identifying the leak early can prevent more significant issues down the line. Common areas for leaks include fittings, joints, and connections.
Using specialized HVAC sealants can provide a quick and effective solution. Always ensure connections are tight and secure to avoid future problems. Regular inspections can help maintain your system’s efficiency and longevity. By addressing leaks promptly, you can ensure a comfortable and cost-effective indoor environment.

Credit: hvacrschool.com
Identifying A Slow Leak In Your Hvac System
A slow leak in your HVAC system can lead to bigger problems. Identifying a leak early can save you time and money. Knowing the signs helps keep your home comfortable and your system efficient.
Signs Of A Leak
- Increased Energy Bills: A leak makes your system work harder.
- Decreased Cooling or Heating: Your home feels less comfortable.
- Strange Noises: Hissing sounds can indicate a leak.
- Moisture Around Unit: Puddles or damp areas may appear.
Tools Needed For Detection
| Tool | Purpose |
|---|---|
| Leak Detector | Finds the exact location of the leak. |
| Soapy Water Solution | Bubbles form at the leak site. |
| UV Dye Kit | Helps detect leaks under UV light. |
| Flashlight | Helps see in dark areas. |
Credit: www.lowes.com
Safety First: Preparing To Fix The Leak
Before fixing any HVAC leak, safety must be your top priority. Preparing properly ensures that you and your equipment remain safe.
Turning Off The Power
First, you need to turn off the power supply to the HVAC system. This prevents any electrical accidents. Locate your system’s circuit breaker and switch it off. Check twice to ensure the power is completely off.
Double-checking ensures no risk of electric shock. This step is crucial for your safety.
Gathering Necessary Equipment
Make sure you have all the needed tools before starting. Here’s a list of essential equipment:
- Leak detection solution
- Wrenches
- Protective gloves
- Safety goggles
- Rags or cloths
Wear protective gloves and safety goggles to protect yourself. These items safeguard your hands and eyes while you work.
Using a leak detection solution helps you find the exact spot of the leak. Apply it to the suspected area and watch for bubbles.
Wrenches are needed for tightening or loosening connections. Make sure they are the right size for your HVAC system.
Keep rags or cloths handy to clean any spills. A clean work area helps you see the leak better.
By following these steps, you ensure a safe and efficient repair process.
Locating The Exact Source Of The Leak
Finding the exact source of an HVAC leak is crucial. It helps prevent further damage and ensures efficient repairs. This section will guide you through the process of locating the leak.
Visual Inspection
Start with a simple visual inspection. Look for obvious signs of leakage. Check connections, joints, and seals for any wet spots or corrosion.
- Examine the HVAC unit for visible drips.
- Look for rust or discoloration around connections.
- Inspect the area for any moisture accumulation.
These signs can help pinpoint the problem area. If you notice any of these, the leak might be nearby.
Using Leak Detection Methods
If a visual inspection doesn’t reveal the leak, use specialized leak detection methods. These methods are more precise and can find hidden leaks.
- Soap Solution: Mix soap with water. Apply to suspected areas. Bubbles indicate a leak.
- Electronic Leak Detectors: These devices detect refrigerant leaks. Move the detector around connections.
- Ultraviolet (UV) Dye: Inject UV dye into the system. Use a UV light to spot leaks.
These methods help find leaks that are not visible to the naked eye. Choose the method that suits your needs best.
| Method | Tools Needed | Effectiveness |
|---|---|---|
| Soap Solution | Soap, Water, Brush | Moderate |
| Electronic Leak Detectors | Leak Detector Device | High |
| Ultraviolet (UV) Dye | UV Dye, UV Light | Very High |
By using these methods, you can accurately locate the leak. This ensures the repair is effective and long-lasting.
Credit: hvacrschool.com
Understanding The Causes Of Hvac Leaks
HVAC leaks can cause many problems. They can reduce efficiency and increase costs. Understanding the causes of these leaks is vital. It helps in timely fixing and preventing further issues.
Common Leak Points
HVAC systems have several areas prone to leaks. Knowing these common leak points helps in identifying and fixing them quickly:
- Refrigerant Lines: These lines carry refrigerant. They are common leak points.
- Evaporator Coils: These coils can corrode over time. This leads to leaks.
- Condensate Drain Lines: These lines can get clogged. This causes water leaks.
- Compressor Seals: Worn-out seals can cause refrigerant leaks.
- Valve Connections: Loose or damaged connections can leak over time.
Why Leaks Develop Over Time
Leaks develop over time due to several reasons. Understanding these reasons can help in preventing them:
- Wear and Tear: Components wear out with use. This leads to leaks.
- Corrosion: Moisture and chemicals cause corrosion. Corrosion leads to leaks.
- Vibration: HVAC systems vibrate during operation. This can loosen connections.
- Poor Installation: Improper installation can cause early leaks.
- Lack of Maintenance: Regular maintenance helps in spotting and fixing leaks early.
By understanding the causes of HVAC leaks, you can take preventive measures. This ensures your system runs efficiently. Regular checks and maintenance can save you time and money.
Step-by-step Repair Process
Fixing a slow leak in your HVAC connection can save money and energy. This guide will walk you through the repair process, ensuring your system runs efficiently. Follow these steps to address minor leaks and replace damaged components.
Sealing Minor Leaks
Sealing minor leaks is often the first step in the repair process. Here are the steps to follow:
- Turn off the HVAC system to ensure safety.
- Identify the leak using soapy water. Spray the area and look for bubbles.
- Clean the area around the leak with a cloth.
- Apply HVAC sealant to the leaking spot. Use a brush for even application.
- Allow the sealant to dry as per the manufacturer’s instructions.
- Turn the HVAC system back on and check for any remaining leaks.
Replacing Damaged Components
If sealing the leak is not enough, you might need to replace damaged components. Here’s how:
- Turn off the HVAC system and disconnect the power supply.
- Identify the damaged part. This could be a hose, valve, or fitting.
- Use a wrench to remove the damaged component carefully.
- Clean the connecting points with a cloth.
- Install the new component. Ensure it fits snugly and securely.
- Reconnect the power supply and turn the system back on.
- Check for leaks by spraying soapy water on the new connection. Look for bubbles.
By following these steps, you can fix slow leaks and ensure your HVAC system runs efficiently. Regular maintenance and timely repairs will keep your system in top shape.
Testing The Repairs
After fixing a slow leak in your HVAC connection, it is crucial to test the repairs. This ensures the leak is properly sealed and the system functions efficiently. Proper testing helps you avoid future issues and maintain your HVAC system’s performance.
Ensuring The Leak Is Fixed
To confirm the leak is fixed, follow these steps:
- Turn on the HVAC system: Run the system at its normal operating levels.
- Check for signs of a leak: Inspect the connection points for any moisture or hissing sounds.
- Use a leak detector: Utilize a leak detector to find any remaining leaks.
Performing these steps guarantees the leak repair is successful. If you spot any issues, address them immediately.
Monitoring For Future Leaks
Regular monitoring helps catch leaks early. Consider the following tips:
- Schedule regular inspections: Inspect your HVAC system at least twice a year.
- Listen for unusual noises: Pay attention to any new sounds from the system.
- Check for moisture: Look for signs of moisture around the HVAC connections.
Using these monitoring techniques helps maintain your HVAC system and prevent future leaks. Consistent checks ensure your system runs smoothly and efficiently.
Preventive Measures To Avoid Future Leaks
Preventive measures ensure your HVAC system works efficiently without leaks. Regular checks and timely actions can prevent unexpected issues. Follow these tips to keep your HVAC system in top shape.
Regular Maintenance Tips
Regular maintenance helps avoid slow leaks in your HVAC connections. Here are some tips to ensure your system remains leak-free:
- Inspect Connections: Check all HVAC connections monthly.
- Clean Filters: Clean or replace filters every three months.
- Check for Wear: Look for signs of wear on hoses and seals.
- Tighten Fittings: Ensure all fittings are tight and secure.
- Monitor Performance: Keep an eye on your HVAC’s efficiency.
When To Call A Professional
Sometimes, a professional touch is necessary. Knowing when to call a professional can save you time and money:
- Persistent Leaks: If leaks continue after DIY fixes.
- Unusual Noises: Strange noises might indicate a deeper issue.
- High Energy Bills: Increased bills suggest inefficiency and possible leaks.
- Poor Airflow: Reduced airflow can signal a significant problem.
- System Age: Older systems may need expert care.
By following these preventive measures, you can maintain a leak-free HVAC system. Regular maintenance and professional help ensure your system works efficiently, saving you from costly repairs.
Understanding The Impact Of Untreated Leaks
Untreated HVAC leaks can cause many issues. These problems can affect your home and health. Knowing the impact of untreated leaks helps you take action quickly.
Increased Energy Costs
Leaks in your HVAC system make the unit work harder. When the unit works harder, it uses more energy. This leads to higher energy bills.
Even a small leak can increase costs. Over time, these costs add up. Fixing leaks saves money and energy.
Potential Health Risks
Leaks can cause poor air quality. Poor air quality can lead to health problems. People with asthma or allergies may suffer more.
Leaks can also cause mold growth. Mold can be harmful to health. It can cause breathing issues and other problems.
| Impact | Details |
|---|---|
| Increased Energy Costs | HVAC works harder, higher energy bills |
| Potential Health Risks | Poor air quality, mold growth |
Acting quickly on leaks prevents these issues. Fixing leaks helps maintain a healthy home.
Conclusion
Fixing a slow leak in your HVAC connection can save energy and money. Regular maintenance prevents bigger issues. Use the steps outlined to ensure your system runs smoothly. A well-maintained HVAC system offers better comfort and efficiency. Always consult a professional if unsure about the repair process.
Keep your home comfortable year-round.