
Wascomat dryers are built for durability and performance, commonly found in both commercial laundromats and residential settings. While these machines are designed for longevity, they can still experience issues that interrupt your laundry routine. Understanding how to troubleshoot your Wascomat dryer effectively can save you time, reduce repair costs, and minimize downtime whether you’re managing a laundromat or handling home laundry.
This guide walks you through practical, step-by-step troubleshooting for the most frequent Wascomat dryer problems. From power failures to unusual noises, overheating to inefficient drying, you’ll learn how to identify the root cause and apply targeted fixes. We’ll also cover essential maintenance practices that prevent recurring issues and extend your dryer’s lifespan.
Understanding Your Wascomat Dryer
Before diving into troubleshooting, it helps to know the basics of how your Wascomat dryer works. Unlike some manufacturers that make error codes public, Wascomat does not publish a standardized list of fault codes in user manuals. Instead, diagnostics often rely on manual testing with a multimeter and visual inspection. This makes basic electrical knowledge and safety awareness especially valuable.
In practice, Wascomat dryers use either electric or gas heating elements depending on the model. Electric models require 240V split-phase power, while gas versions use propane or natural gas and still need 120V for controls and ignition. Regardless of type, airflow and heat regulation are critical to safe operation.
Key Components to Know
| Component | Function |
|---|---|
| Heating Element | Generates heat in electric dryers |
| Ignition System | Lights the burner in gas dryers |
| Drum Seals & Bearings | Support the drum and seal airflow |
| Control Board | Manages cycle settings and safety monitoring |
| Door Switch | Prevents operation when door is open |
| Thermal Fuse | Cuts power if internal temp exceeds safe limit |
Understanding these parts makes troubleshooting much more straightforward. Let’s now look at common symptoms and what they typically point to.
Power Issues: Dryer Won’t Start or Turn On
A Wascomat dryer that won’t start is frustrating. Fortunately, most startup problems trace back to a few familiar culprits. Before calling a technician, always go through this checklist—it resolves the majority of no-start cases.
Step-by-Step Diagnosis
1. Check Power Source
Start here because it’s easiest and most overlooked:
- Is the dryer plugged in? Sometimes cords work loose after delivery or vibration.
- Look at the circuit breaker — has it tripped? Flip it off and back on to reset.
- If using a wall-mounted outlet, test it with another appliance like a hair dryer or vacuum cleaner.
⚠️ Tip: Electric dryers draw significant current. A tripped breaker often means something else drew too much simultaneously—not necessarily your dryer.
2. Inspect the Power Cord
Visually check the power cord for cuts, burns, or exposed wiring. Gently tug on the plug to make sure it's seated firmly.
Use a multimeter set to continuity mode:
- Unplug the dryer.
- Test between each prong and corresponding terminal inside the dryer.
- No continuity = replace the cord immediately.
3. Door Switch Failure
The door switch prevents operation when the door isn't fully closed. If misaligned or worn out, it interrupts startup.
To test:
- Close the door and press down lightly near the latch.
- Try starting the dryer. Does it begin tumbling?
- Use a multimeter across the switch terminals while pressing the actuator pin.
- No continuity under pressure = faulty switch.
Replace switches carefully—they’re inexpensive (~$10–$20) but vital.
4. Control Panel Problems
If the display flickers or buttons feel unresponsive:
- Unplug the dryer for five minutes to force a soft reset.
- Reconnect and retry.
- Buttons physically degraded or stuck = likely control panel failure requiring replacement.
While possible to DIY, replacing control boards requires precision soldering skills and access to replacement units only available through authorized dealers.
Heating Failures: Dryer Runs But Doesn’t Heat
One of the trickiest issues to diagnose without formal training is why your Wascomat dryer runs but produces no heat. Since heating systems vary significantly between electric and gas models, we’ll cover both separately.
Electric Dryers: No Heat Troubleshooting
Electric dryers generate heat via resistive heating coils controlled by thermostats and thermal fuses. Start with non-invasive checks before disassembling panels.
Primary Checks
Lint Filter & Ventilation Path
Even partial blockages restrict airflow and cause overheating protection circuits to shut off heating automatically.- Remove the lint filter housing and vacuum thoroughly.
- Disconnect the vent hose and run a snake brush through the entire duct line.
- Confirm outside vent flap opens freely.
Multimeter Tests
Always disconnect power before testing components.
| Part | Resistance Reading |
|---|---|
| Heating Element | 8–20 ohms |
| Thermal Cut-Out (TCU) | Infinite until triggered |
| Cycling Thermostat | Low resistance (~0Ω), increases slightly with warmth |
| High-Limit Thermostat | Same as above |
Any reading significantly higher than expected—or infinite where continuity is required—means replacement urgently.
Belt Tension & Motor Condition
Excessive drag from binding belts or failing motors forces limit switches to disable heating to protect components.Manually spin the drum by hand. It should rotate smoothly with minimal effort. Rough spots or stiffness suggest mechanical wear needing attention.
Gas Dryers: Flame Failure Diagnosis
Gas dryers ignite burners using an electrically heated glow plug or intermittent pilot system. Lack of flame usually stems from one failed component.
Most Likely Causes
Thermal Fuse Blown
Like electric models, high temperatures open this safety fuse permanently once exceeded limits. Visibly charred appearance confirms damage; replacement resolves issue.Faulty Ignitor/Glow Plug
Cracked ceramic elements crack over time. Visible fractures or darkened surfaces mean replacement.Flame Sensor Malfunction
Flame rectification sensors detect whether gas successfully lit. Corroded contacts or incorrect positioning interrupt signal transmission unnecessarily.Clean gently with fine steel wool, ensuring good metal-to-metal contact upon reassembly.
Gas Valve Solenoid Defects
Internal springs weaken over years. Weak pull-in force prevents full valve opening even if ignitor glows red-hot.Replace solenoids individually after confirming proper voltage reaches them (requires advanced tools).
🔧 Pro Tip: Many DIYers assume gas issues stem from fuel supply itself—but 90% of flame failures originate from faulty ignitors or sensors.
Strange Noises and Vibration Problems
Noisy dryers aren’t just annoying—they’re early warning signs of internal wear that, left unchecked, can worsen rapidly—and expensively.
Types of Noise and What They Mean
| Noise Type | Source | Urgency Level |
|---|---|---|
| Squeaking | Worn belt/idler pulley | Medium |
| Rumbling | Drum support rollers/bearings | High |
| Thumping | Uneven load or foreign object | Immediate |
| Humming | Failing motor winding | Urgent |
| Grinding | Metal-on-metal contact | Critical |
Each sound tells a story. Listen closely and correlate timing with specific actions.
Fixing the Big Three: Belts, Rollers, Pulley
These components bear constant stress. Annual inspections go far toward preventing breakdowns.
How to Inspect Drive Components
Power Down Completely
Never attempt disassembly while connected to mains electricity.Access Rear Panel
Remove screws along edges. Slide panel upward slightly before pulling away.Locate Drum Support Rollers
Found beneath the drum shell. Spin each roller by hand; listen for grittiness or uneven rotation.Check Idler Pulley Assembly
Spring-loaded tension arm holds serpentine belt tight against motor pulley. Worn bushings create squeal.Inspect Belt Itself
Look for cracking, fraying, or stretching beyond manufacturer specs.
📏 Replacement Guideline: Any roller showing play side-to-side or resistance when turned by hand must be swapped. Same applies to drywall texture rollers—yes, they wear similarly!
Excessive Heat and Fire Hazards
Overheating isn’t just inconvenient—it poses real danger. Fortunately, Wascomat built multiple layers of protection directly into its designs—but regular cleaning keeps everything functioning safely.
Why Overheating Occurs
There are three main reasons your dryer gets hotter than normal:
Blocked Airflow Pathways
Lint buildup restricts circulation, trapping hot air inside cabinet.Defective Temperature Sensors
Aging thermostats fail to monitor correctly, allowing unchecked temperature rise.Motor Strain
Increased RPM strain causes friction that generates additional unwanted heat.
Preventive Measures
Regular deep-cleaning every 6 months prevents most incidents. Here’s what to do:
- Vacuum entire blower housing quarterly.
- Brush out accumulated particles around motor windings annually.
- Wash removable parts with mild detergent solution monthly.
Also inspect thermal cutoff devices visually—if charred or deformed, replace instantly.
Poor Drying Performance: Clothes Still Damp
Slow-drying cycles waste energy and frustrate users. Several interrelated factors affect how quickly moisture leaves fabrics.
Root Causes Analysis
| Factor | Impact |
|---|---|
| Lint Accumulation | Major airflow obstruction |
| Vent Hose Kinks | Restricts exhaust path |
| Overloaded Drum | Limits tumbling action |
| Low Airflow | Prevents moisture removal |
Fixing poor performance generally involves improving air passage rather than increasing heat output dramatically.
Boost Efficiency Without Sacrificing Safety
Try these adjustments before considering hardware upgrades:
Clean Exhaust Line Thoroughly
Commercial-grade rotobrush tools cost less than one emergency service call.Balance Load Sizes Properly
Medium-large loads allow optimal tumbling motion.Verify Outside Vent Integrity
Weather caps installed improperly block exhaust flow entirely.Monitor Ambient Humidity Levels
Very humid days naturally extend drying times regardless of equipment condition.
💡 Note: Modern heat-pump dryers offer alternative drying technology—but retrofitting older Wascomats isn’t feasible due to sealed-loop constraints.
FAQs About Wascomat Dryer Troubleshooting
How Do I Reset a Wascomat Dryer?
Unplug the dryer for 5–10 minutes to clear stored data from control board memory. Plug back in and restart cycle normally.
What Does Error Code E14 Mean?
Unlike many brands, Wascomat doesn’t officially publish codes like E14. However, similar symptoms—such as intermittent heating—often indicate thermistor or sensor failure.
Why Won’t My Dryer Start?
Most common reasons include blown thermal fuse, defective door switch, unplugged unit, or tripped breaker.
Is There a Fuse I Can Replace Myself?
Yes—if located externally on terminal block or accessible junction box. Internal fuses embedded within electronics require professional intervention.
Does My Dryer Need Professional Calibration?
Generally no unless erratic behavior persists following component replacements. Occasional recalibration ensures accurate sensor feedback loops.
Preventative Maintenance Checklist
| Task | Frequency | Tools Needed |
|---|---|---|
| Clean Lint Screen | After every use | None |
| Clear Vent Hose | Monthly | Vacuum |
| Wipe Down Interior Drum | Quarterly | Microfiber cloth |
| Deep Clean Blower Housing | Biannually | Shop vacuum |
| Lubricate Drum Rollers | Yearly | Sewing machine oil |
| Test Continuity Components | Every 2 Years | Multimeter |
Following this schedule consistently pays dividends in uptime and reduced wear.
When to Call a Professional Technician
Despite best efforts, sometimes deeper issues demand expert intervention. Watch for these red flags indicating beyond-DIY territory:
- Burn marks inside control panel
- Multiple simultaneous component losses
- Unusual burning smell persisting after cleaning
- Circuit breaker trips repeatedly upon plugging in
- Complex gas line diagnostics involving pressure testing
Professionals bring calibrated instruments, experience interpreting subtle anomalies, and liability coverage missing from consumer-level troubleshooting attempts.
For certified support nationwide, visit Wascomat Commercial Laundry Equipment directly.
Final Thoughts on Mastering Wascomat Dryer Troubleshooting
Troubleshooting a Wascomat dryer empowers you to solve many everyday problems confidently and independently. Armed with basic electrical testing tools, patience, and systematic thinking, most minor faults resolve within an afternoon rather than days waiting for service calls.
Remember: preventive care beats reactive repair nine times out of ten. Keep your dryer clean, balanced, and powered correctly—and it rewards you with reliable, consistent performance year after year.
Stay dry, stay savvy—and happy troubleshooting!
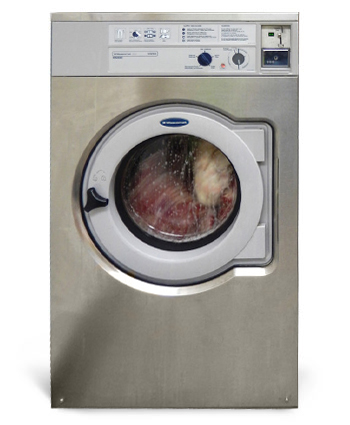 Image source: laundromania.com
How To Fix D90 Code On Lg Dryer · LG Washer And Dryer CD Code · LG Dryer CL Code Blinking · Troubleshooting LG Dryer Error Codes · NP Code On LG Dryer