
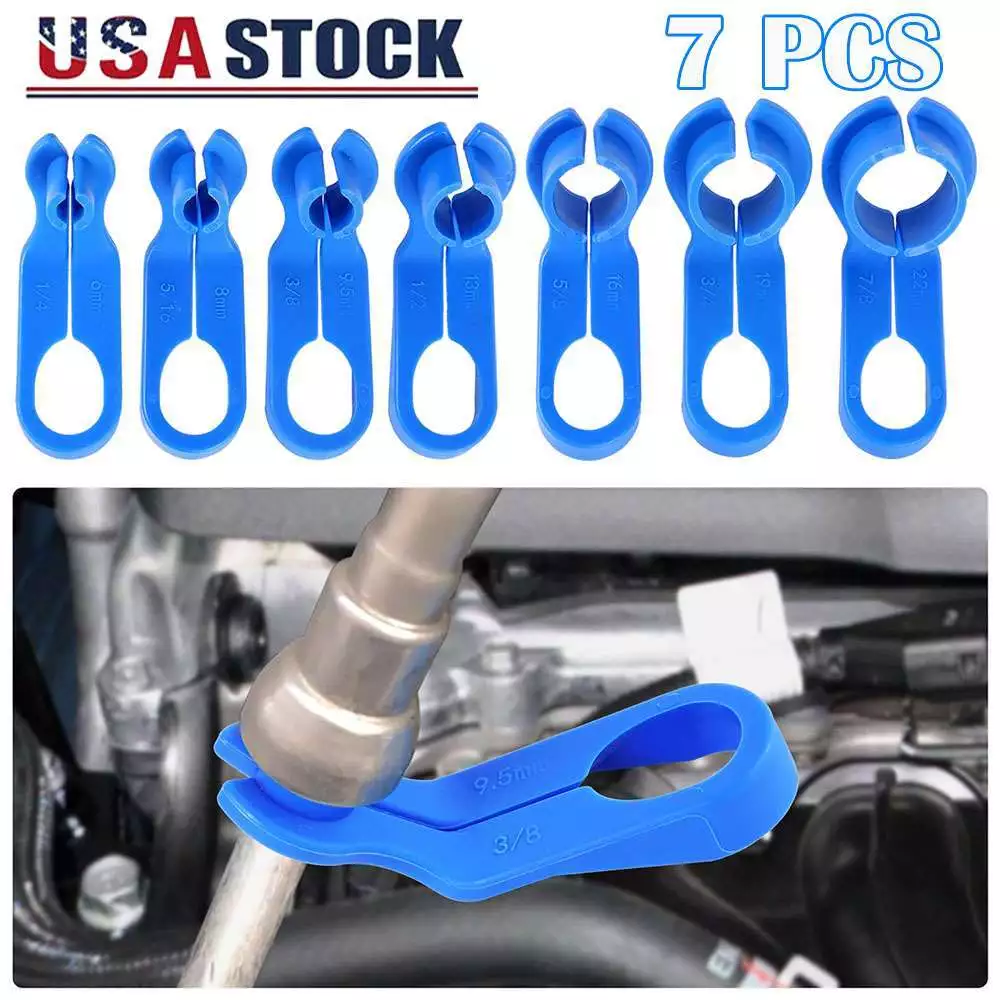
To connect an HVAC removal tool, securely attach the tool to the HVAC unit’s access point. Ensure the tool’s connection is tight.
Connecting an HVAC removal tool is essential for maintenance and repairs. These tools help in safely removing components like refrigerant lines or valves. Proper connection ensures efficient operation and prevents potential damage to the unit. Always follow the manufacturer’s guidelines for tool attachment to avoid mishaps.
HVAC systems are intricate, and using the right tools effectively can save time and money. Regular maintenance using these tools can prolong the lifespan of your HVAC system, ensuring it runs smoothly. Whether you’re a professional or a DIY enthusiast, mastering the use of an HVAC removal tool is crucial for optimal system performance.
Introduction To Hvac Removal Tools
Removing an HVAC system requires specific tools and knowledge. This guide will help you understand the essential tools and safety tips. By the end, you will be prepared for HVAC removal.
Essential Tools For The Job
To remove an HVAC system, you’ll need several tools:
- Screwdrivers: For loosening screws and fasteners.
- Wrenches: For bolts and nuts.
- Pliers: For gripping and pulling wires.
- Utility Knife: For cutting insulation and tape.
- Multimeter: For checking electrical connections.
- Manifold Gauge Set: For handling refrigerants.
Having these tools ready ensures a smoother removal process. Proper tools make the job easier and faster. Always use the right tool for each task.
Safety First: Preparing For Removal
Safety is crucial when removing an HVAC system. Follow these steps to prepare:
- Turn Off Power: Shut off the electricity to the HVAC unit.
- Wear Safety Gear: Put on gloves, goggles, and a mask.
- Ventilate the Area: Ensure good air circulation.
- Release Refrigerant: Use a recovery machine to handle refrigerants.
- Label Wires: Mark wires to avoid confusion later.
Following these steps keeps you safe and organized. Always prioritize safety during the removal process. Proper preparation prevents accidents and mistakes.

Credit: www.amazon.com
Identifying The Hvac Components
Connecting an HVAC removal tool starts with knowing the components. This guide helps you identify these parts easily. Understanding these parts ensures a smooth and safe process.
Key Parts Of The Hvac System
- Compressor: The heart of the system, it pumps refrigerant through the unit.
- Evaporator Coil: Absorbs heat from the air inside your home.
- Condenser Coil: Releases the absorbed heat outside.
- Blower Motor: Circulates air across the evaporator coil.
- Thermostat: Controls the temperature setting of your home.
When To Remove Or Replace
Knowing when to remove or replace HVAC parts is crucial. Here are some signs:
- Increased Energy Bills: A faulty unit uses more energy.
- Strange Noises: Unusual sounds signal a problem.
- Poor Air Quality: Dust and allergens in the air indicate issues.
- Frequent Repairs: Repeated fixes suggest a need for replacement.
- Uneven Cooling/Heating: Inconsistent temperatures mean trouble.
If you notice these signs, it’s time to act. Use an HVAC removal tool correctly to avoid damage. Proper use extends the lifespan of your system.
| Component | Function | Signs of Trouble |
|---|---|---|
| Compressor | Pumps refrigerant | Loud noises, no cooling |
| Evaporator Coil | Absorbs heat | Ice build-up, weak airflow |
| Condenser Coil | Releases heat | Overheating, inefficient cooling |
| Blower Motor | Circulates air | Weak airflow, strange noises |
| Thermostat | Controls temperature | Inaccurate readings, no response |
Pre-removal Steps
Before using an HVAC removal tool, take some important steps. These steps ensure safety and efficiency. Follow our guide to prepare your workspace properly.
Disconnecting Power
Always disconnect power before starting any HVAC work. This step is crucial for safety.
- Locate the power switch.
- Turn off the power.
- Double-check with a voltage tester.
If the HVAC unit has a battery backup, remove it. This prevents any accidental power flow.
Securing The Work Area
Securing the work area is the next important step. Remove any obstacles around the HVAC unit.
- Clear debris and tools.
- Ensure proper lighting.
- Set up safety barriers.
Wear protective gear like gloves and safety glasses. This keeps you safe from any unexpected hazards.
| Task | Steps |
|---|---|
| Disconnect Power |
|
| Secure Work Area |
|
Credit: www.ebay.com
Using The Hvac Removal Tool
Connecting an HVAC removal tool is essential for efficient maintenance. This guide will help you use the tool correctly and effectively.
Step-by-step Guide
- Turn off power: Always switch off the HVAC unit.
- Gather tools: Collect the HVAC removal tool and other necessary tools.
- Locate screws: Find the screws holding the unit in place.
- Insert tool: Carefully insert the removal tool into the screws.
- Loosen screws: Gently twist the tool to loosen the screws.
- Remove unit: Once screws are loose, remove the HVAC unit safely.
Tips For Efficient Use
- Read manual: Always read the HVAC manual first.
- Work slowly: Take your time to avoid mistakes.
- Use proper tools: Ensure you have the right tools for the job.
- Check connections: Double-check all connections before starting.
- Wear safety gear: Always wear gloves and safety glasses.
Troubleshooting Common Issues
Connecting an HVAC removal tool can sometimes be tricky. Various issues can arise, making the process frustrating. In this section, we’ll address common problems and provide solutions to make your task easier.
Dealing With Rust And Corrosion
Rust and corrosion can cause significant issues when connecting an HVAC removal tool. These elements can make it difficult to fit the tool properly.
- Inspect the area for any visible rust or corrosion.
- Use a rust remover spray to clean the affected parts.
- Scrub the area gently with a wire brush.
After cleaning, make sure to dry the area thoroughly. This prevents further rust buildup. Apply a light coat of lubricant to keep the parts in good condition.
When The Tool Doesn’t Fit
Sometimes, the HVAC removal tool may not fit as expected. This can be due to several reasons.
| Issue | Solution |
|---|---|
| Tool is too large | Check if you have the correct tool size. |
| Tool is too small | Verify the dimensions and try a different tool. |
| Obstructions | Clear any debris or obstacles in the way. |
Always ensure you are using the right tool for the job. Double-check the tool specifications and the HVAC unit requirements.
Post-removal Process
After removing your HVAC components, you need to follow some steps. These steps ensure your system remains clean and efficient. This section will guide you through the post-removal process.
Cleaning And Maintenance
Cleaning and maintenance are crucial after removing HVAC components. Here are some steps you should follow:
- Wipe down all exposed surfaces with a clean cloth.
- Vacuum any dust or debris from the area.
- Use a mild detergent to clean any stubborn dirt.
- Inspect all parts for wear and tear.
- Replace any damaged components immediately.
Regular maintenance keeps your HVAC system running smoothly.
Proper Disposal Of Old Components
Proper disposal of old components is essential. Follow these steps to ensure safe disposal:
- Separate the components into metal, plastic, and electronic parts.
- Take metal parts to a recycling center.
- Dispose of plastic parts in the appropriate waste bins.
- Take electronic components to a specialized disposal facility.
- Ensure you follow all local regulations for disposal.
Disposing of old components properly helps protect the environment.
Safety Measures And Best Practices
Connecting an HVAC removal tool requires attention to safety. Proper safety measures and best practices ensure a smooth and safe process. This guide details the essential steps and precautions.
Personal Protective Equipment (ppe)
Wearing Personal Protective Equipment (PPE) is crucial. Always wear safety goggles to protect your eyes from debris. Use gloves to shield your hands from sharp edges. Ensure you wear sturdy footwear to prevent foot injuries. A hard hat can protect your head from falling objects.
Here is a quick list of essential PPE:
- Safety Goggles
- Gloves
- Sturdy Footwear
- Hard Hat
Avoiding Common Mistakes
Avoiding common mistakes during the HVAC removal process can save time and prevent injury. Never rush the process. Make sure the power supply is off before starting. Double-check all connections are secure before removing any components.
Here is a table summarizing common mistakes and how to avoid them:
| Common Mistake | How to Avoid |
|---|---|
| Not turning off power | Always switch off the power supply first. |
| Rushing the process | Take your time to avoid accidents. |
| Improper connections | Double-check all connections before removing components. |
Follow these best practices to ensure a smooth and safe HVAC removal process.
- Plan your steps before starting.
- Use the right tools for the job.
- Follow the manufacturer’s instructions.
Advanced Techniques And Tools
Using advanced techniques and tools for HVAC removal can make the process smoother. It helps to use the right tools and learn from experts. This section will guide you through upgrading your toolkit and learning from the best.
Upgrading Your Toolkit
Upgrading your toolkit is essential for efficient HVAC removal. Here are some tools you should consider:
- Vacuum Pump: Removes air and moisture from HVAC systems.
- Manifold Gauge Set: Measures pressure in the HVAC system.
- Refrigerant Recovery Machine: Safely removes refrigerant from the system.
- Pipe Cutter: Precisely cuts pipes for easy removal.
- Leak Detector: Finds leaks in the HVAC system quickly.
Ensure your tools are well-maintained and in good condition. This will make your job easier and faster.
Learning From The Experts
Learning from experts can help you master HVAC removal techniques. Here are some tips:
- Watch Tutorials: Many experts share their knowledge through online videos.
- Join Workshops: Attend HVAC workshops to learn hands-on techniques.
- Read Manuals: Manuals provide detailed instructions for using HVAC tools.
- Network: Connect with other HVAC professionals to exchange tips.
By following these steps, you can improve your skills and confidence in HVAC removal.
Credit: www.walmart.com
Conclusion
Mastering the HVAC removal tool connection process ensures efficient system maintenance. Following these steps boosts safety and performance. Always prioritize using the correct tools and procedures. Regular practice will enhance your skills, making HVAC tasks simpler and quicker. Keep learning and stay updated with industry standards for optimal results.