
To install a washer and dryer in a closet, make sure to measure the space appropriately and ensure proper ventilation for the appliances. In addition, consider the location of water and electrical connections for easy installation and maintenance.
Are you planning to install a washer and dryer in your closet? This convenient solution maximizes space and eliminates the need for a dedicated laundry room. However, it requires careful planning and execution to ensure a successful installation. In this guide, we will provide you with step-by-step instructions on how to properly install a washer and dryer in your closet.
From measuring the space to ensuring proper ventilation and connections, we have everything covered to make this process smooth and hassle-free. So, let’s get started and transform your closet into a functional laundry area.
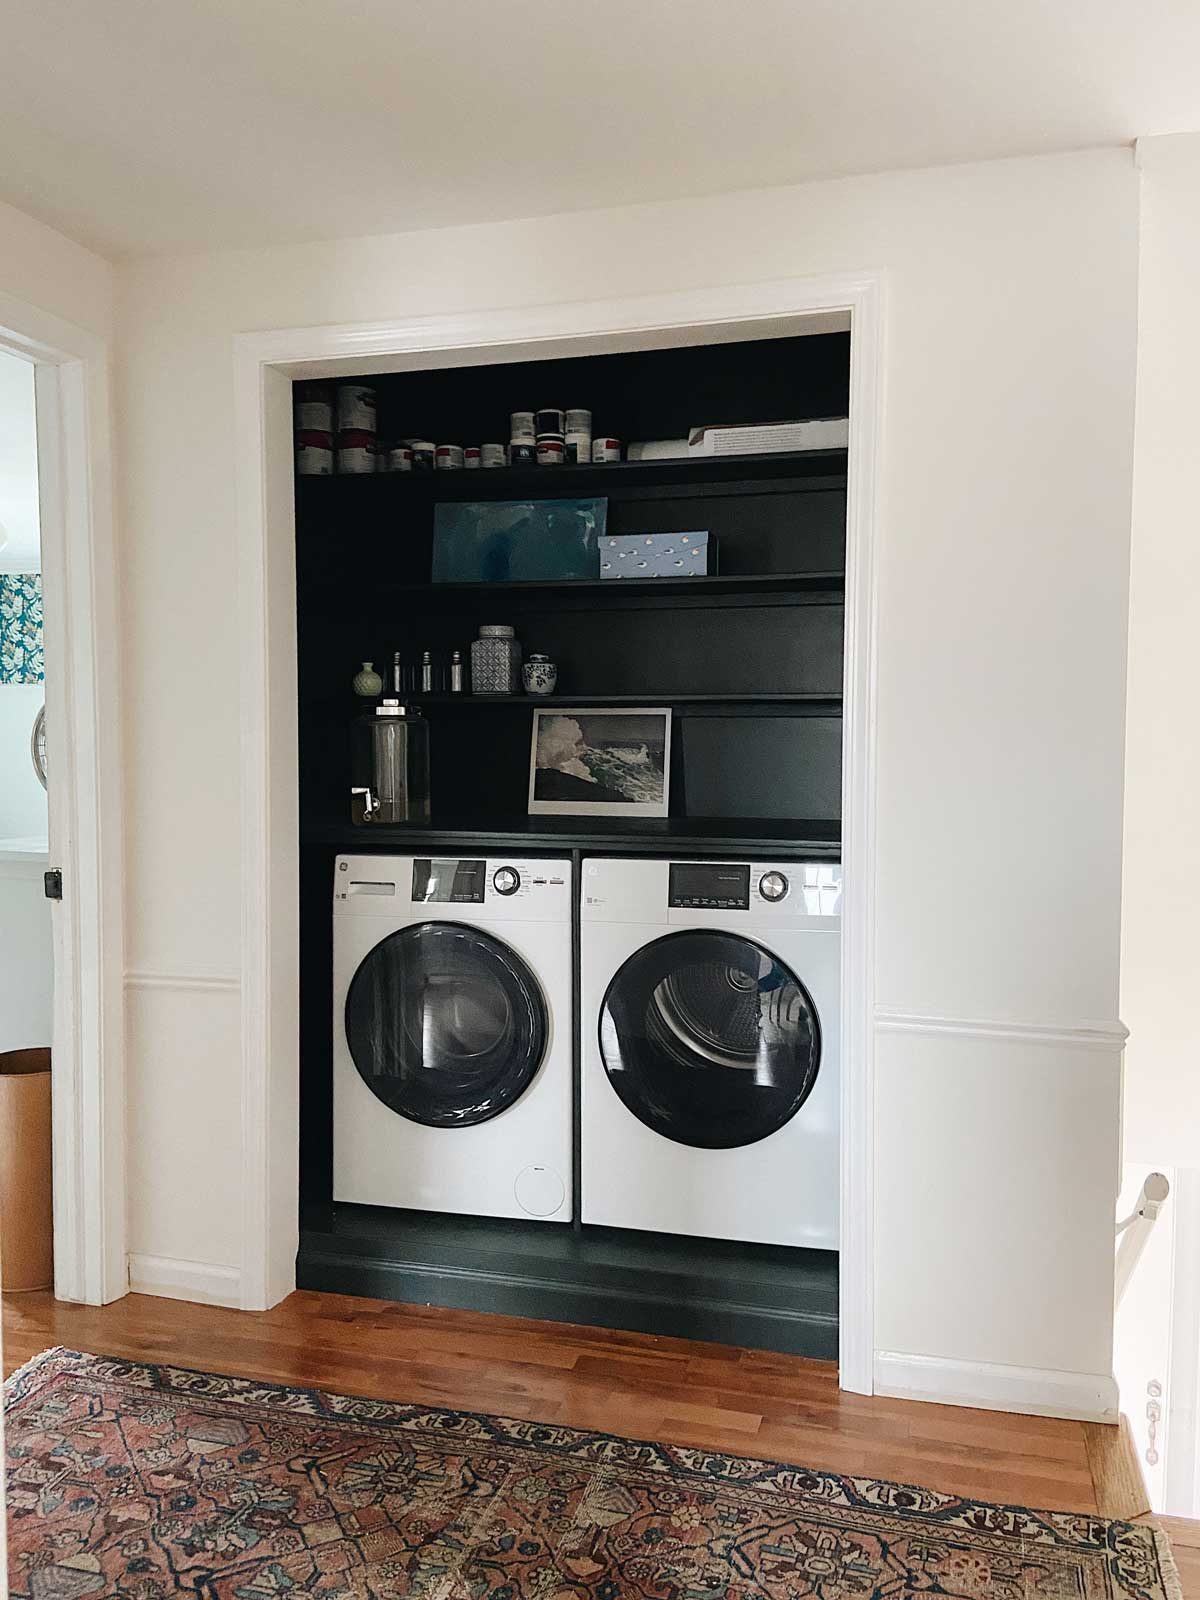
:max_bytes(150000):strip_icc()/5J1A77512-5a81e3a32e754b9985b22d5ae5d8f32a.jpg)
Credit: www.thespruce.com
Preparing The Closet
Installing a washer and dryer in a closet can be a great space-saving solution. However, before you embark on this project, it’s essential to properly prepare the closet to ensure a smooth installation process. This involves measuring the available space, clearing out the closet, and ensuring proper ventilation. In this guide, we’ll take you through each step in detail, so you can confidently set up your washer and dryer in the closet.
Measuring The Available Space
The first step in preparing your closet for a washer and dryer installation is measuring the available space. Using a tape measure, take accurate measurements of the height, width, and depth of the closet. Make sure to note down these measurements as you will need them later when selecting the right-sized appliances.
Additionally, consider measuring the size of your desired washer and dryer units. This will help determine if they can fit comfortably within the closet space without obstructing any doors or vents. Remember, ensuring adequate clearance around the appliances is crucial for easy access during installation and maintenance.
Clearing Out The Closet
Once you have measured the available space, it’s time to clear out the closet. Remove any items stored inside, including clothing, shelves, or organizers. It’s important to create an empty space to allow for easy maneuvering and installation of the washer and dryer units. Consider finding temporary storage for these items until the installation is complete.
Additionally, inspect the closet for any obstructions that may impede the installation process. Look out for protruding pipes, electrical outlets, or ventilation ducts that may need to be relocated or modified. Clearing away any clutter and ensuring a clean, obstruction-free environment will make the installation much smoother.
Ensuring Proper Ventilation
Proper ventilation is crucial when installing a washer and dryer in a closet. Without adequate airflow, lingering moisture can lead to mold or mildew growth, unpleasant odors, and potentially damage to the appliances. Therefore, it’s important to ensure proper ventilation in the closet.
To achieve this, you can consider adding a ventilation fan or exhaust system to the closet. This will help remove excess humidity and enhance air circulation, keeping the closet and appliances dry and odor-free. Consulting with a professional regarding the best ventilation solution for your specific closet layout is highly recommended.
By following these steps, you are now ready to proceed with installing your washer and dryer in the closet. Stay tuned for our next guide, where we will cover the actual installation process, including necessary connections and safety precautions.
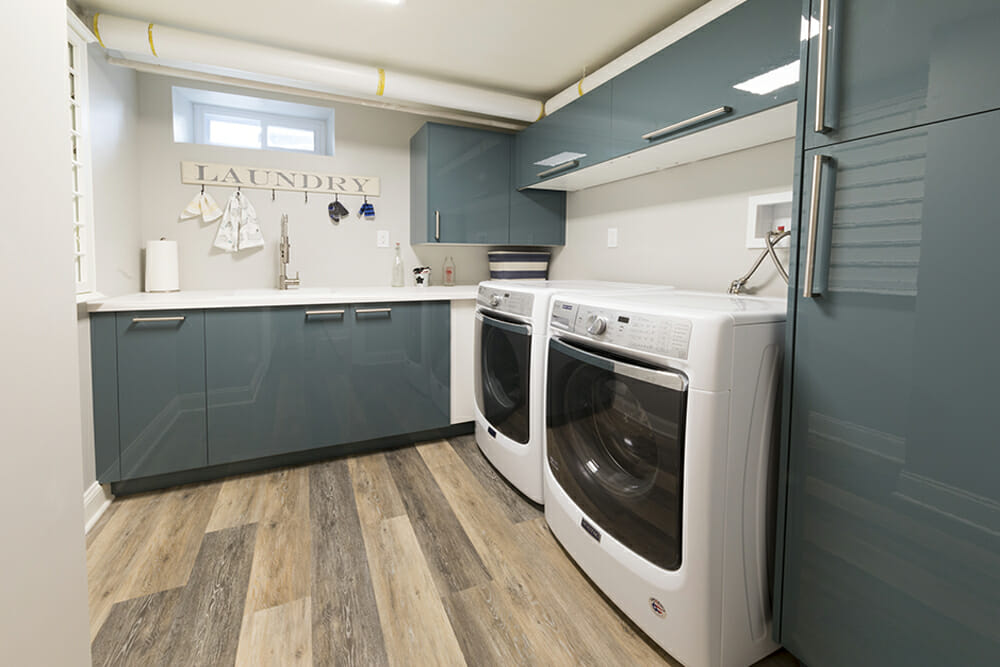
Credit: rachelschultz.com
Installing The Washer
Installing a washer and dryer in a closet is a straightforward process that can help save space in your home. With proper measurements and basic tools, you can easily set up your appliances and enjoy the convenience of a compact laundry area.
Installing the Washer
Installing a washer and dryer in a closet can help save space and provide a convenient laundry solution. In this guide, we will focus on the first step: installing the washer. We will cover everything from choosing a suitable washer to preparing the plumbing connections and ensuring a proper installation in your closet.
Choosing A Suitable Washer
To begin, selecting the right washer for your closet is crucial. Consider these factors when making your decision:
1. Size: Measure the closet space carefully to ensure the washer will fit within the available dimensions. Look for compact models specifically designed for closets.
2. Capacity: Determine the laundry load size you typically need to manage. Choose a washer that can handle your average load efficiently.
3. Energy Efficiency: Opt for a washer with high Energy Star ratings to reduce energy consumption and save on utility bills.
4. Noise Level: As the closet is within your living space, go for a washer with a low noise level to prevent any disturbance.
5. Features: Depending on your preferences, look for features such as different wash cycles, automatic dispensers, and advanced controls that suit your laundry needs.
Preparing The Plumbing Connections
Before installing your washer, it’s essential to ensure the plumbing connections are properly prepared. Follow these steps:
1. Locate the existing water supply lines in your closet. Ensure there are both hot and cold water lines nearby.
2. Shut off the water supply and drain any remaining water from the pipes by turning on the faucets until they run dry.
3. Install shut-off valves to the hot and cold water supply lines. These valves will allow you to control the water flow to the washer.
4. Connect the water supply hoses to the shut-off valves, ensuring a secure and leak-free connection. Use appropriate fittings if necessary.
Installing The Washer In The Closet
Now that you have chosen a suitable washer and prepared the plumbing connections, it’s time to install the washer in the closet. Follow these steps:
1. Place a sturdy and level base or platform inside the closet to position the washer on. This will help stabilize the machine during use.
2. Carefully position the washer on the base, making sure it is level and balanced. Use a level to check for any adjustments needed.
3. Connect the water supply hoses to the back of the washer. Ensure they are securely fastened to prevent leaks.
4. Plug in the power cord of the washer to a nearby outlet. Make sure the outlet is grounded for safety.
5. Carefully slide the washer into its final position within the closet, ensuring there is enough space for the dryer if installing both.
6. Adjust any leveling feet or stabilizing mechanisms on the washer to ensure it is firmly in place and does not wobble during operation.
Remember, if you are unsure about any steps in the installation process, it’s always best to consult a professional plumber or follow the manufacturer’s instructions for your specific washer model. With the washer properly installed, you can now move on to installing the dryer in your closet, which we will cover in our next guide.
Installing The Dryer
Installing a dryer in a closet is a simple process. Follow these steps to ensure a smooth installation.
Installing the dryer in your closet is a convenient way to save space and keep your laundry area organized. In this section, we will guide you through the process of installing the dryer. This involves choosing a suitable dryer, preparing the electrical connections, and then actually installing the dryer in the closet. Let’s get started!
Choosing A Suitable Dryer:
Before installing the dryer, it’s important to choose a suitable one that fits your needs and the available space in your closet. Consider the following factors when selecting a dryer:
– Size: Measure the dimensions of your closet to ensure that the dryer you choose will fit properly. Take into account the depth, width, and height, and compare them with the dimensions of the dryer.
– Type: There are different types of dryers available, such as gas or electric. Choose the type that is compatible with your electrical setup and preferences.
– Capacity: Determine the capacity of the dryer based on your laundry needs. Consider the size of your washer and choose a dryer that can accommodate the same load size.
Preparing The Electrical Connections:
Before installing the dryer, you need to prepare the electrical connections in your closet. Follow these steps:
1. Make sure the power to the closet is turned off from the main electrical panel to ensure safety during the installation process.
2. Carefully inspect the electrical outlet in the closet to ensure that it is suitable for use with the dryer. It should be a 240-volt outlet with the appropriate wiring and grounding.
3. If your existing outlet does not meet the requirements, contact a qualified electrician to make the necessary changes or install a new outlet.
4. Once the electrical outlet is suitable for use, connect the dryer cord to the outlet following the manufacturer’s instructions. Ensure that the connections are secure and properly grounded to prevent any electrical hazards.
Installing The Dryer In The Closet:
Now that you have chosen a suitable dryer and prepared the electrical connections, it’s time to install the dryer in the closet. Follow these steps:
1. Place the dryer in the desired location in the closet. Make sure there is enough space around it for proper ventilation and access to the controls.
2. Use a level to ensure that the dryer is sitting evenly. Adjust the feet or add shims if needed to achieve a level position.
3. Once the dryer is in position, connect the vent hose to the back of the dryer. Secure it firmly to prevent any air leaks.
4. Carefully slide the dryer into place, ensuring that it is aligned with the electrical outlet and vent opening.
5. Double-check all the connections and make sure they are secure.
And there you have it! Your dryer is now successfully installed in your closet. Enjoy the convenience of having your laundry appliances tucked away neatly, while still maintaining the functionality and efficiency of your washer and dryer setup.
Credit: sweeten.com
Frequently Asked Questions On How To Install Washer And Dryer In Closet
Can You Put A Washer And Dryer In A Closet?
Yes, you can put a washer and dryer in a closet. Make sure the closet is large enough to accommodate both appliances and has proper ventilation. Plan for electrical and plumbing connections. Consider a compact or stackable washer and dryer to maximize space.
Is There A Way To Have A Washer And Dryer Without Hookups?
You can have a washer and dryer without hookups by using a ventless washer/dryer combo. It operates by condensing moisture from the drying process and has no need for external venting. This innovative solution provides convenience and flexibility for any living space.
How Hard Is It To Install Washer And Dryer Hookups?
Installing washer and dryer hookups is not too difficult. It requires basic plumbing and electrical skills, but with some guidance and the right tools, it can be done. Just make sure to follow the manufacturer’s instructions and local building codes for a safe and successful installation.
Can You Install A Washer And Dryer Anywhere?
Yes, a washer and dryer can be installed anywhere as long as there is a proper water supply and electrical connection available. It is advisable to consult with a professional plumber or electrician to ensure safe installation and to comply with local building codes.
How Much Space Do I Need To Install A Washer And Dryer In A Closet?
You will need a minimum of 5 feet by 20 inches of space to comfortably fit a washer and dryer in a closet.
Conclusion
In a nutshell, installing a washer and dryer in a closet is a convenient and space-saving solution for many homeowners. By following the steps outlined in this guide, you can successfully set up your appliances without any hassle. Remember to carefully plan the layout, ensure proper ventilation, and address any electrical or plumbing concerns.
With a little attention to detail, you’ll have a functional laundry area that seamlessly integrates into your home.