
Learning how to set up a sump pump correctly prevents basement flooding and protects your home’s foundation from costly water damage. A proper installation requires matching the right equipment to your specific water table conditions while strictly following electrical safety codes.
The National Electrical Code mandates GFCI protection for all sump pump receptacles as of 2026 to prevent shock hazards in wet environments. Getting these foundational safety and sizing details right is the only way to ensure reliable long-term performance.
how to set up a sump pump
Set up a sump pump by excavating a level pit. Install a gravel base and basin liner. Connect PVC discharge piping with a check valve.
Wire to a dedicated GFCI circuit. Adjust the float switch height. Test the full cycle before sealing the lid.
Critical Safety and Code Requirements Before You Dig
Electrical Safety: GFCI Protection and Dedicated Circuits
Sump pumps require a dedicated 15-amp or 20-amp GFCI outlet per NEC Article 680 standards. Sharing circuits with lights or other appliances risks tripping breakers during storms when you need protection most. Always verify grounding integrity before connecting any pump wiring.
Water and electricity are a dangerous combination in basement environments. Manufacturer specifications confirm that non-GFCI connections void most equipment warranties immediately. If your panel lacks capacity, hire an electrician rather than risking unsafe workarounds.
Discharge Rules: Storm Sewer vs. Sanitary Sewer Compliance
Local plumbing codes almost universally prohibit discharging sump water into sanitary sewer systems. This practice overwhelms treatment facilities and can result in significant municipal fines. You must route discharge to storm drains, dry wells, or approved exterior grading areas.
Check your local building department requirements before trenching any exterior lines. Some municipalities require permits for new discharge points or backflow prevention devices. Ignoring these regulations creates liability issues during future property inspections or sales.
Radon Mitigation: Sealing the Pit Properly
An unsealed sump basin acts as a direct entry point for soil gases like radon. EPA mitigation standards require airtight lids with sealed cord and pipe penetrations. Use caulk or foam gaskets designed specifically for radon-resistant construction.
This step is non-negotiable in high-radon zones even if testing currently shows safe levels. Seasonal pressure changes can dramatically increase gas infiltration through open pits. Proper sealing maintains indoor air quality without compromising pump accessibility for maintenance.
Choosing the Right Pump and Basin for Your Water Table
Submersible vs. Pedestal: Matching Pump Type to Pit Size
Submersible pumps sit inside the basin and handle higher volumes quietly but cost more upfront. Pedestal models mount above the pit for easier access but run louder and suit narrower basins. Match your choice to available space and expected water volume.
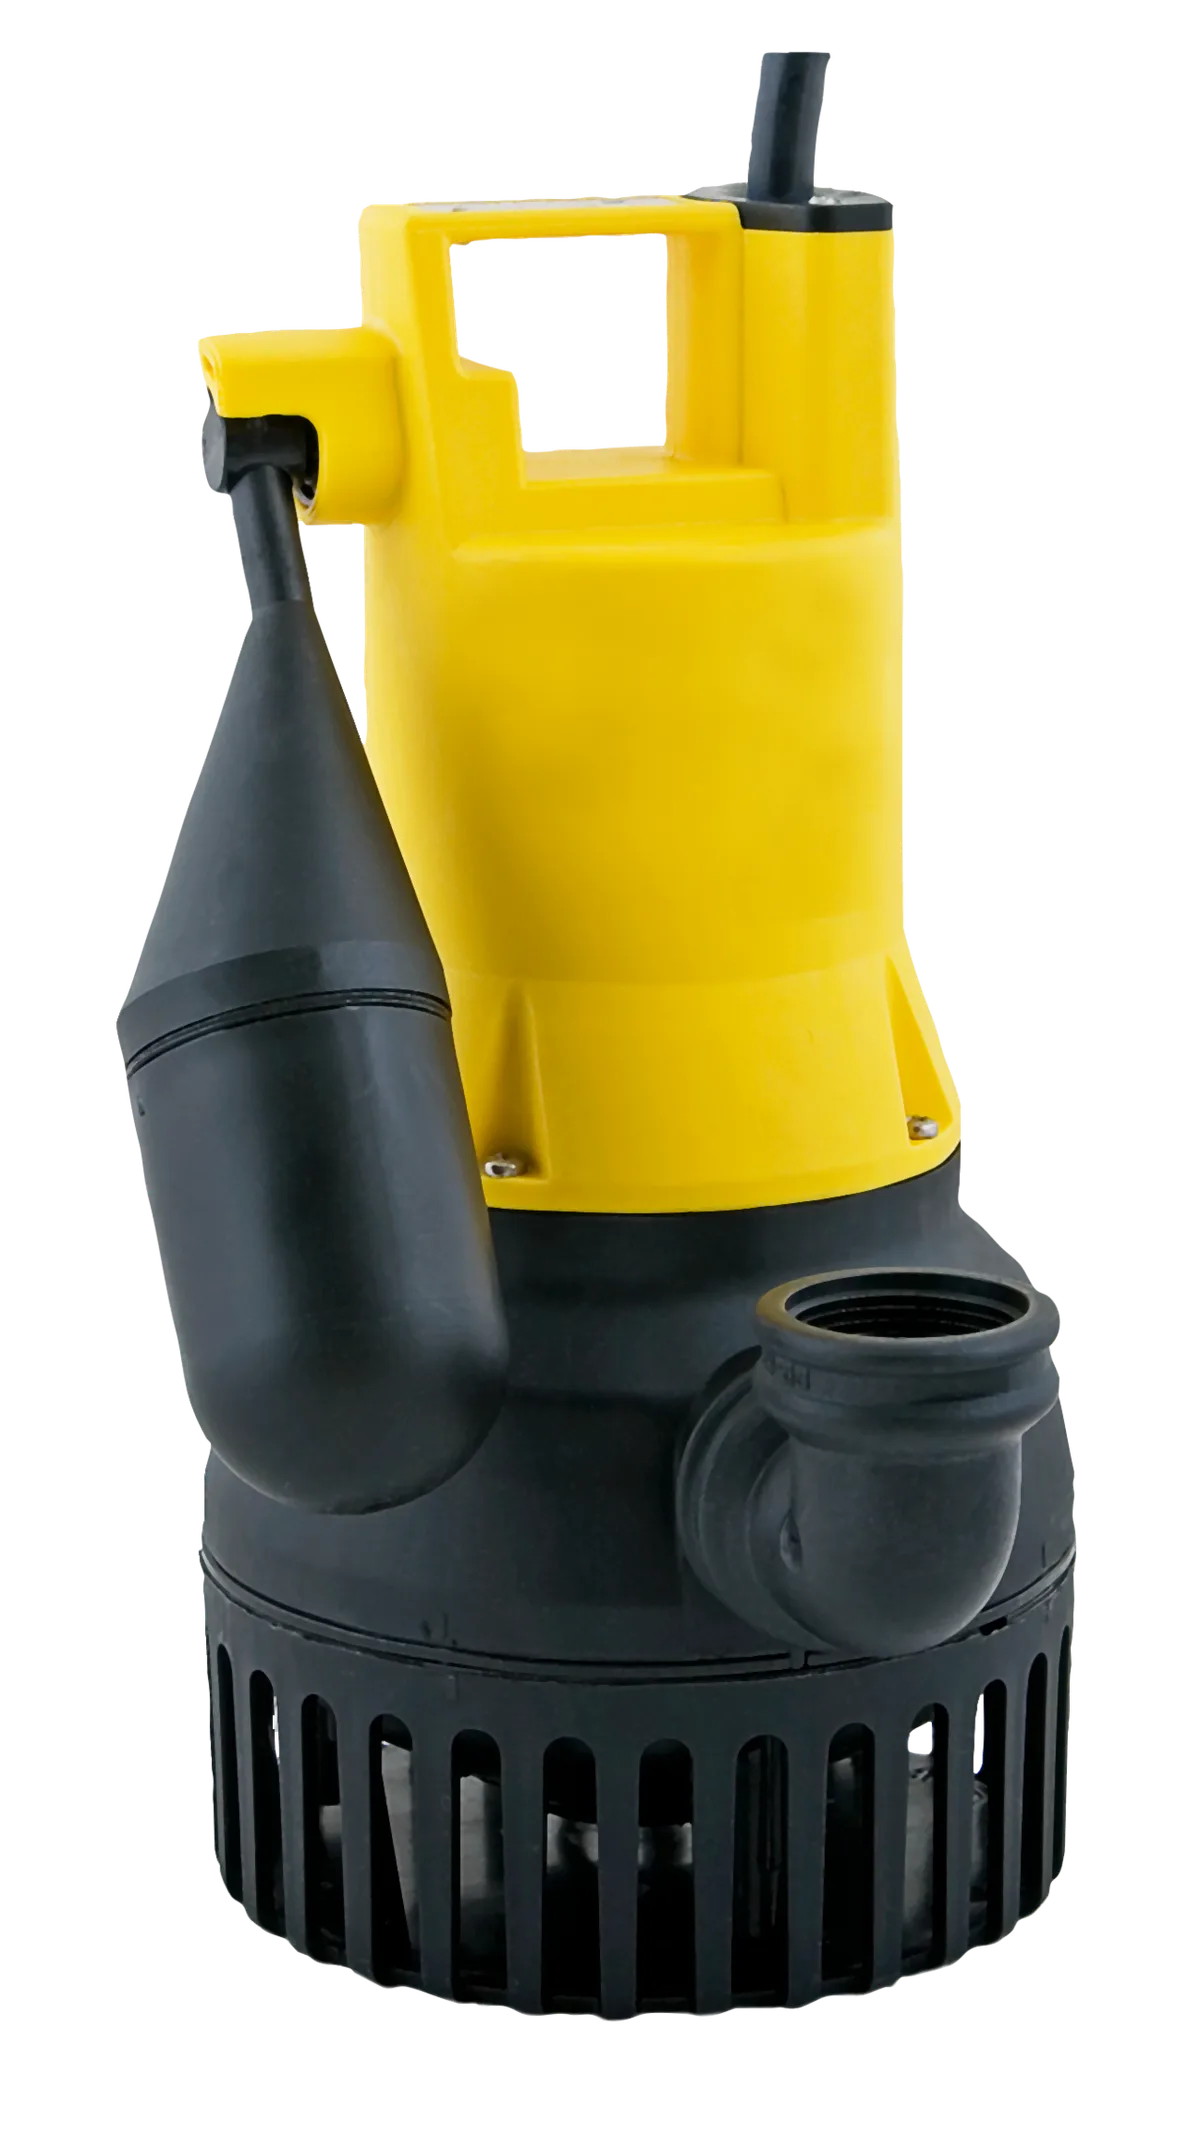
Image source: Wikimedia Commons / PumpExpert (CC BY-SA)
Aggregate reviews indicate submersible units last longer due to water-cooled motors. Pedestal pumps excel in tight retrofit situations where basin diameter is under 18 inches. Consider noise tolerance and long-term replacement costs when deciding between types.
Sizing by Head Pressure and Flow Rate (GPH)
Horsepower alone does not determine adequate pump capacity for your situation. You must calculate total dynamic head including vertical lift and horizontal pipe friction. Manufacturer performance curves show actual gallons per hour at specific head heights.
A 1/3 HP pump moving 2400 GPH at zero feet might deliver only 900 GPH at 20 feet of head. Undersizing causes burnout while oversizing leads to destructive short cycling. Consult SSPMA sizing guidelines or professional waterproofing assessments for accurate calculations.
Switch Types: Float vs. Electronic Reliability
Vertical float switches are mechanical and prone to debris interference over time. Tethered floats offer adjustable activation points but need sufficient clearance space. Electronic diaphragm switches eliminate moving parts and resist clogging in sediment-heavy water.
Electronic options cost more initially but reduce service calls significantly according to verified buyer feedback. Mechanical floats remain viable for clean-water applications with regular inspection schedules. Choose based on your water quality and willingness to perform routine maintenance.
Step-by-Step Installation Workflow for a Safe Setup
Excavation, Basin Leveling, and Gravel Base Prep
Dig the pit deep enough so the basin rim sits flush with or slightly below slab grade. Create a six-inch compacted gravel base for drainage and stability. Level carefully because tilted basins cause premature switch failure and uneven wear.
Use coarse washed gravel rather than fine pea stone for optimal water flow. Tamp the base firmly to prevent settling after heavy rain events. This foundation work determines whether your system functions reliably for decades or fails within seasons.
Plumbing the Discharge Line with Proper Check Valve Orientation
Install a swing or spring-loaded check valve vertically above the basin lid. The arrow must point upward toward discharge to prevent backflow hammer. Secure connections with stainless steel clamps rated for constant moisture exposure.
Glue all PVC joints using primer and cement formulated for wet conditions. Maintain minimum 1/8 inch per foot slope on horizontal runs to prevent freezing. Flexible corrugated tubing kinks easily and should be avoided for permanent installations despite lower upfront cost.
Wiring, Float Adjustment, and Final Cycle Testing
Connect power only after all plumbing is complete and leak-tested. Adjust float height so the pump activates before water reaches inlet tiles. Run multiple test cycles by filling the basin manually to verify automatic shutoff.
Listen for unusual vibrations or check valve slamming during testing. Document baseline amp draw readings for future troubleshooting reference. Never assume correct operation without witnessing at least three complete on-off cycles under load.
Common Installation Mistakes That Cause Failure or Flooding
Short Cycling, Frozen Lines, and Weep Hole Errors
Short cycling destroys motors and usually indicates an oversized pump or stuck switch. Frozen discharge lines occur when exterior burial depth ignores local frost line data. Missing weep holes on check valves create air locks that prevent priming.
Drill a 3/16 inch weep hole between the check valve and pump discharge port. Bury exterior pipes below regional frost depth or install heat trace cables. Address cycling issues immediately rather than accepting frequent replacements as normal operational costs.
When to Stop DIY and Call a Licensed Professional
Complex electrical upgrades or structural slab cutting exceed typical homeowner skill sets safely. High water tables requiring multiple pumps or perimeter drain integration demand specialized engineering knowledge. Permitting complications often justify professional handling from the start.
Licensed contractors carry liability insurance protecting you from installation errors causing property damage. Their expertise ensures code compliance that survives future inspections and insurance claims. Budget for professional help when stakes involve finished living spaces or expensive contents.
Frequently Asked Questions
How deep should a sump pit be?
Most residential basins require 22 to 36 inches of depth depending on drain tile elevation. The pit bottom must sit below incoming pipe inlets to allow sediment settling. Shallow pits cause constant debris ingestion and premature pump failure.
Always measure existing drainage infrastructure before purchasing equipment.
Can I plug a sump pump into a regular outlet?
No, NEC Article 680 requires GFCI protection for all sump pump receptacles. Standard outlets lack ground fault interruption needed in wet basement environments. Using unprotected circuits risks electrocution and voids manufacturer warranties.
Install a dedicated GFCI outlet before operating any pump.
Why does my sump pump run every few minutes?
Frequent cycling typically means the pump is oversized for your actual water inflow rate. It could also indicate a failed check valve allowing backflow refilling. Stuck float switches or debris obstruction cause similar symptoms.
Diagnose the root cause before replacing components repeatedly.
Do I need a battery backup sump pump?
Battery backups are essential in areas with frequent power outages during storms. Primary pumps provide zero protection when electricity fails precisely when flooding risk peaks. Water-powered backups offer alternative protection without battery maintenance concerns.
Evaluate your local outage history and flood risk tolerance.