
A loose dryer drum creates loud banging noises, uneven drying, and can damage your clothes or the appliance itself. This happens when internal components that support and spin the drum wear out or break. The most common culprits are worn drum support rollers, a stretched drive belt, or failing drum glides. Fixing it requires identifying which part has failed, ordering the correct replacement, and reassembling the dryer in proper alignment. Most homeowners can complete this repair in 1–2 hours using basic hand tools, saving the cost of a service call. However, electrical issues or severe damage may warrant professional help.
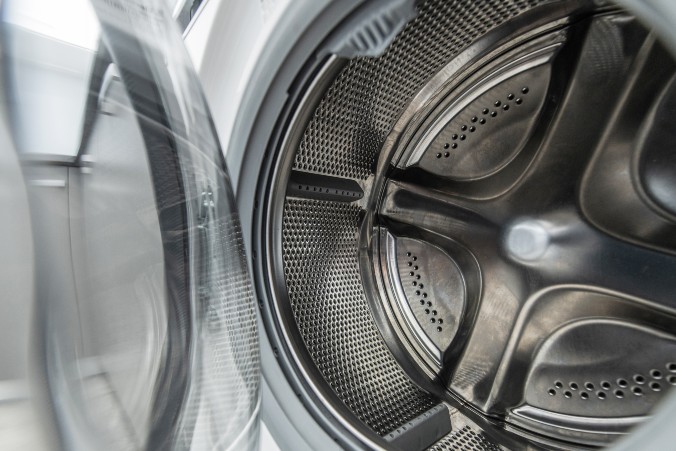
Inspecting a loose drum after removing the dryer's front panel.
Common Causes of a Loose Dryer Drum
Worn Drum Support Rollers
Drum support rollers are small wheels mounted on axles that rotate as the drum spins. They bear the weight of the drum and its contents. Over time, the bearings inside the rollers wear out, causing them to wobble or seize. A single bad roller creates uneven rotation, making the entire drum loose. Most dryers have two or more rollers—a failed pair causes noticeable vertical movement during operation. For more on this, see our guide on how to fix d90 code on lg dryer.
Stretched or Broken Drive Belt
The drive belt connects the motor pulley to the drum, creating the rotational force needed for tumbling. As belts age, they stretch, reducing tension and allowing slippage. A stretched belt causes slow or inconsistent drum rotation. In severe cases, the belt may snap entirely, leaving the drum unsupported and free-spinning by hand.
Damaged Drum Glides or Bearings
Drum glides (or bushings) are low-friction pads located at the front of the drum that guide its movement. When these wear down, the drum tilts forward and rubs against the front panel. Some models use a rear bearing instead, which supports the drum from behind. Failing bearings produce grinding or squealing noises and contribute directly to drum looseness. For more on this, see our guide on top 7 hair dryer under 50.
Broken Motor Mounts
Motor mounts secure the motor to the frame. If they crack or break, the motor shifts position, throwing off belt alignment and reducing tension. This misalignment allows the drum to sag or bind, contributing to looseness. While less common, damaged mounts also stress other components like pulleys and belts.
Tools and Parts You’ll Need
Before disassembling your dryer, gather the following tools:
| Tool | Purpose |
|---|---|
| Nut driver set | Removing screws and panels |
| Socket wrench set | Accessing bolts inside the dryer |
| Phillips and flathead screwdrivers | Handling various fasteners |
| Multimeter | Testing electrical connections |
| Flashlight or headlamp | Illuminating internal components |
| Work gloves | Protecting hands from sharp edges |
Replacement parts vary by model but typically include:
- New drum support rollers (if worn)
- Replacement drive belt (if stretched or snapped)
- Drum glides or bearings (if damaged)
- Motor mounts (if broken)
Always verify compatibility using your dryer’s make, model, and serial number. Manuals often list part numbers, or you can search online databases provided by manufacturers like Whirlpool, GE, or Frigidaire.
Step-by-Step Repair Process
1. Disconnect Power and Gas Supply
Unplug the dryer from the wall outlet. For gas dryers, turn off the gas valve behind the unit. Never attempt repairs while connected to power—electrical shock is a real risk near moving machinery.
2. Remove the Dryer Top Panel
Locate the release clips along the seam between the top and side panels. Insert a putty knife under the edge and press firmly until the clip releases. Lift the top upward and prop it open with a rod or stick. Be cautious—some tops are hinged and swing backward.
3. Detach the Front Panel
Remove the screws securing the front panel—usually found near the door hinge or at the bottom corners. Once unscrewed, carefully lift the panel upward and forward to disconnect it from the frame. Place it safely aside, keeping screws attached if possible.

Lifting the dryer front panel requires care to avoid damaging wiring.
4. Inspect Drum Support Rollers
Reach into the drum cavity and locate the rollers mounted on metal axles. Spin each roller by hand—if it feels gritty, wobbly, or doesn’t rotate smoothly, replace all rollers in the set. Mixing old and new rollers leads to uneven wear and premature failure.
5. Check Belt Tension and Condition
Follow the belt path around the motor pulley and idler pulley. Look for cracks, fraying, or glazing (shiny spots indicating slippage). Press down gently on the belt mid-span—if it deflects more than half an inch, it needs replacement.
6. Examine Drum Glides and Rear Bearing
Check the front edge of the drum for metal-on-metal contact or excessive play. Worn glides allow forward tilt; replace them in pairs. For rear-bearing models, inspect for rust, cracks, or looseness where the drum contacts the bearing housing.
7. Replace Faulty Components
Remove old parts according to the manufacturer’s instructions. Typically, you’ll slide new rollers onto axles, route the new belt correctly around pulleys, and install fresh glides with adhesive backing.
8. Reassemble and Test
Reinstall the front panel, reconnect wires, and close the top. Plug in the dryer and run a short cycle. Listen for grinding or squeaking, and check that the drum rotates freely without wobbling.

Manually rotating the drum helps identify residual binding after reassembly.
Preventive Maintenance Tips
Regular maintenance prevents many drum-related issues:
- Clean the lint trap after every load to reduce heat buildup and improve airflow.
- Vacuum the exhaust vent annually to remove lint buildup that strains the motor.
- Level the dryer quarterly using adjustable feet to minimize drum strain.
- Avoid overloading—leave space for clothes to tumble freely.
- Schedule visual inspections every six months to catch early signs of wear.
When to Call a Professional
While DIY repairs work well for mechanical failures, certain situations require expert intervention:
- Electrical faults or error codes displayed on digital panels.
- Complex internal wiring that differs from standard configurations.
- Gas line disconnections or leak detection in gas dryers.
- Warranty-covered units where unauthorized disassembly voids coverage.
Professionals bring diagnostic equipment and experience to resolve issues efficiently and safely.
Frequently Asked Questions
What does a loose dryer drum sound like?
A loose drum typically produces a rhythmic banging or thudding noise as the drum shifts during rotation. You might hear metallic clanking if components scrape against each other.
Can I keep using my dryer with a loose drum?
No—continuing to operate a dryer with a loose drum risks damaging additional parts, including the belt, motor, and heating elements. It also poses a fire hazard from overheated components.
How much does it cost to fix a loose dryer drum?
DIY repairs range from $20 to $100 depending on parts needed. Professional service calls average $150 to $300, including labor and parts. Replacing a whole motor or control board increases costs significantly.
Is replacing the dryer drum itself ever necessary?
Yes—if the drum is cracked or severely warped, replacement is required. However, most cases involve replacing rollers, belts, or glides rather than the drum itself.
Do I need special training to perform this repair?
Basic mechanical skills suffice, but familiarity with appliance anatomy helps. Always consult your owner's manual and watch manufacturer-specific tutorials linked below for confidence.
Should I replace both drum rollers if only one seems faulty?
Absolutely—replace all rollers simultaneously. Worn rollers degrade together, so leaving one old roller invites immediate future breakdowns.
Final Thoughts
Fixing a loose dryer drum restores quiet operation, efficient drying, and long-term reliability. With patience and attention to detail, most homeowners can handle this task independently. Prioritize safety throughout—never skip disconnecting power. If uncertainty arises, especially with electrical systems or gas lines, contacting a certified technician ensures correctness and peace of mind. Routine upkeep extends your dryer’s lifespan and catches minor issues before they escalate into costly disasters.