
Understanding how to install a sump pump in a yard can prevent thousands of dollars in water damage. Most homeowners only learn this after their basement floods. The process involves more than just dropping a pump into a hole.
You'll need to consider local soil conditions, electrical access, and proper discharge routing. A typical residential system handles 1,500 to 6,000 gallons per hour. Getting these basics right saves time and money later.
Let's walk through what really matters when setting up your yard drainage system.
Why Proper Sump Pump Placement Matters
Basement flooding costs homeowners an average of $3,600 per claim according to the National Flood Insurance Program. Poor placement turns a simple installation into a recurring nightmare.
The key is positioning your sump basin at the lowest point where water naturally collects. If you've ever seen puddles form near your foundation after rain, that's your clue. Water follows gravity, so your pump needs to sit where it can intercept the flow before it reaches your basement walls.
Place the basin at least 10 feet from your home's foundation. Too close, and you're just moving water around your basement instead of away from it. The discharge pipe should carry water at least 10 to 20 feet from the house.
Anything shorter, and you're basically creating a mini fountain next to your foundation.
Key Components and Site Assessment
Before breaking ground, you need to understand what goes where. Per OSHA trenching safety guidelines, any excavation deeper than 5 feet requires protective systems. Your typical sump basin sits 18 to 24 inches below floor level, so you're likely safe without shoring, but always call 811 to mark underground utilities first.
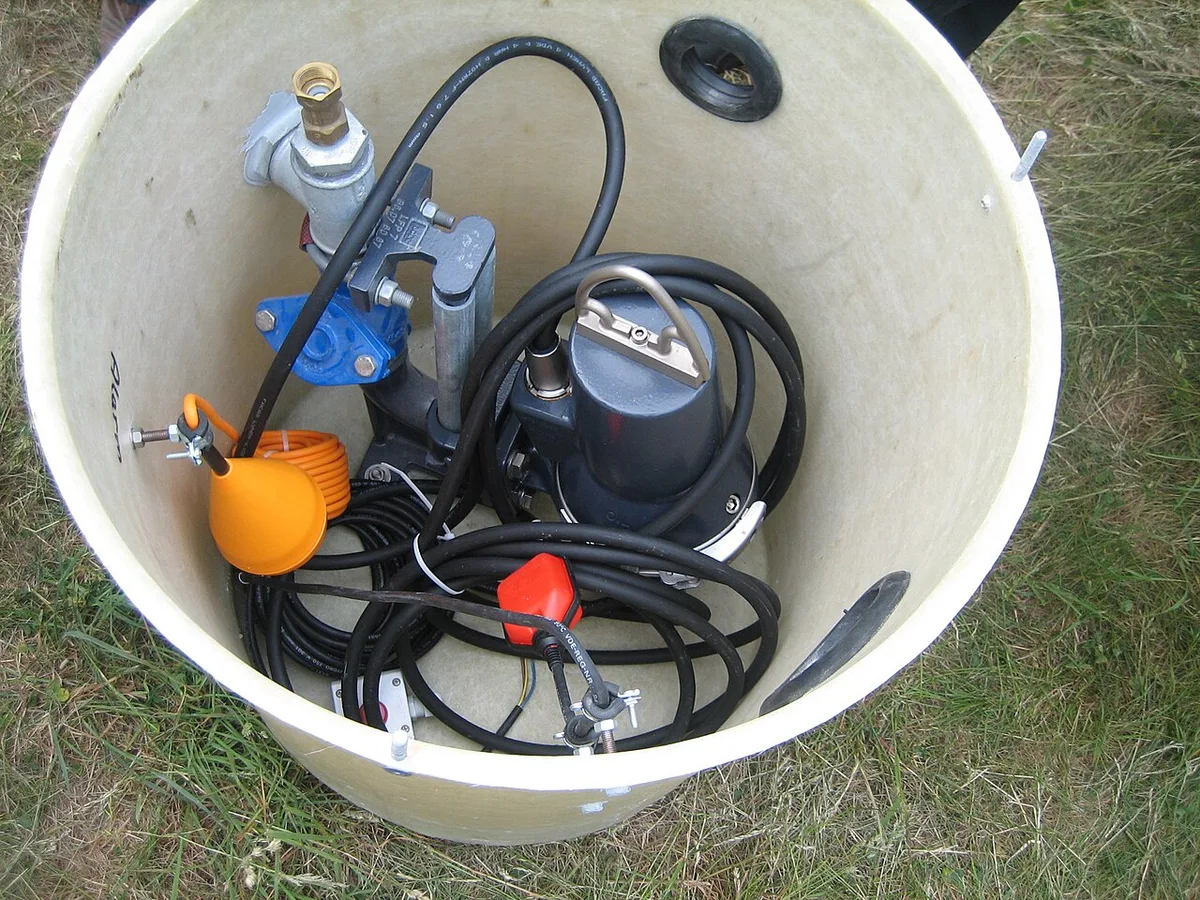
Your core components include:
| Component | Purpose | Typical Specs |
|---|---|---|
| Sump basin | Collection chamber | 18-30 inch diameter |
| Submersible pump | Water removal | 1/3 to 3/4 HP |
| Discharge pipe | Water transport | 1.5-2 inch PVC |
| Check valve | Prevents backflow | Rated for pump GPH |
Soil type determines everything. Clay holds water like a bucket and drains slowly. Sandy soil lets water pass through quickly but may require a larger collection area.
Run a simple percolation test: dig a 1-foot hole, fill it with water, and time how long it takes to drain.
If water disappears within 30 seconds, you're dealing with sandy or gravelly soil. If it takes 4 hours or more, expect slow drainage. This tells you whether to size your basin larger or add additional inlet pipes around the perimeter.
Step-by-Step Installation Process
Start by marking your basin location with spray paint. Dig slightly wider than your basin, leaving 2 inches of clearance on all sides. Depth matters more than width here, so aim for 2 inches below your planned inlet pipe connection.
Set your basin level. Use a 2-foot level across the top edge. Uneven basins cause pump problems later.
Fill the gap around the edges with gravel, not soil. Gravel allows water to flow freely into the basin from all directions.
Next, connect your inlet pipes. These should slope toward the basin at 1/4 inch per foot. Too steep, and you risk sediment buildup.
Too flat, and water won't flow properly. Use 4-inch perforated pipe wrapped in landscape fabric to keep debris out.
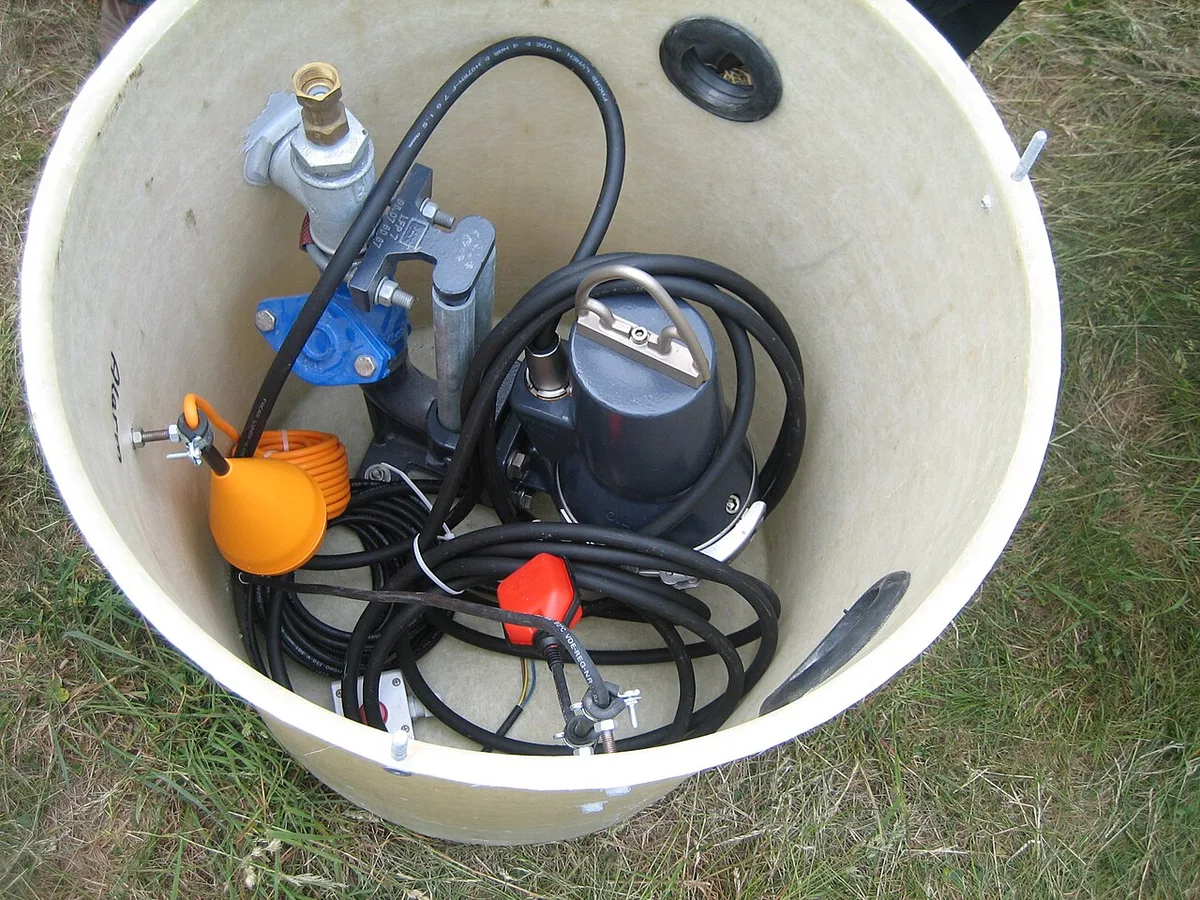
Install your discharge pipe with the same 1/4-inch-per-foot slope away from the house. This prevents water from pooling near your foundation. Attach a check valve 6 to 12 inches above the pump outlet.
Without it, your pump cycles on and off constantly, burning out the motor prematurely.
Run a dedicated 15-amp circuit to your GFCI outlet. Never plug into a standard indoor outlet. Your pump draws significant power during startup, and sharing circuits causes breaker trips when you need it most.
Common Installation Mistakes to Avoid
The biggest rookie error is placing the basin too close to your foundation. Water collects there naturally, which seems smart until you realize you're just concentrating flow toward your basement walls. Maintain that minimum 10-foot setback.
Another frequent problem: skipping the check valve. Without one, water flows back into the basin after the pump shuts off. This causes short cycling that burns out motors in under two years.
Install it correctly with the arrow pointing toward the discharge side.
Frozen discharge pipes kill pumps in winter. Insulate exposed piping or bury it below the frost line. Where freezing occurs naturally, consider a discharge extension that keeps water away from your basement windows and doorways.
Electrical shortcuts create safety hazards. Never use extension cords or indoor-rated outlets. Your pump needs a weatherproof outdoor GFCI on its own circuit.
A single mistake here could electrocute someone or start a fire.
Testing delays are another trap. Many homeowners install the system, flip the switch, and walk away. Instead, pour water into the basin and verify the float switch activates at the right level.
Run this test monthly during heavy rain seasons.
Frequently Asked Questions
How deep should I bury my sump pump in the yard?
Bury the basin so the top sits 2 inches below your inlet pipe connection. This typically means 18 to 24 inches deep, depending on your local frost line. The basin must sit below grade to collect groundwater effectively.
Can I install a sump pump without electrical access?
Battery-powered pumps exist but have limited runtime. Most systems need hardwired electrical on a dedicated GFCI circuit. Solar options work in remote areas but struggle with consistent power demands.
What size sump basin do I need for my yard?
Standard residential basins measure 18 to 30 inches in diameter. Match your basin size to your expected water volume. Heavy clay soil or high water tables require larger basins with multiple inlet connections.
How far from my house should the discharge pipe extend?
Position the discharge outlet at least 10 to 20 feet from your foundation. This prevents water from collecting near your basement walls and causing the very flooding you're trying to prevent.
When should I test my yard sump pump?
Test monthly during wet seasons by pouring water into the basin. Verify the float switch activates and water discharges properly. Replace backup batteries annually, especially before winter months.