
Knowing how to replace a sump pump backup battery correctly prevents basement flooding during power outages. This task involves electrical safety risks that require careful preparation before you begin.
Manufacturer specifications indicate most residential systems need a 12V deep-cycle battery with at least 75Ah capacity. We will walk through the safe replacement process that protects both you and your equipment.
How to Replace a Sump Pump Backup Battery
Disconnect all power sources before starting any work. Remove negative cable first then positive. Install new deep-cycle battery matching original specs.
Reconnect positive terminal then negative. Test system operation under load immediately. Verify charger maintains proper voltage output.
Why Your Sump Pump Backup Battery Replacement Is a Safety Job, Not Just a Swap
Replacing this battery involves serious electrical and chemical hazards. Lead-acid batteries produce explosive hydrogen gas during charging cycles. A single spark near an unventilated battery box can cause injury or damage.
You also risk damaging sensitive control boards through incorrect polarity. Reversing connections even briefly often fries the inverter or charger module. These components cost hundreds of dollars to replace as of 2026.
OSHA standards require proper ventilation for indoor battery installations. You must verify your enclosure meets current safety codes before proceeding. Skipping this check voids warranties and creates liability issues.
Always treat this as a hazardous maintenance task rather than simple parts swapping. Respect the stored energy in these systems to avoid costly mistakes.
Choosing the Right Deep-Cycle Battery and Pre-Replacement Safety Checks
Selecting the correct battery chemistry determines your system's reliability. Flooded lead-acid batteries are affordable but require monthly water checks. AGM batteries offer maintenance-free operation with better vibration resistance.
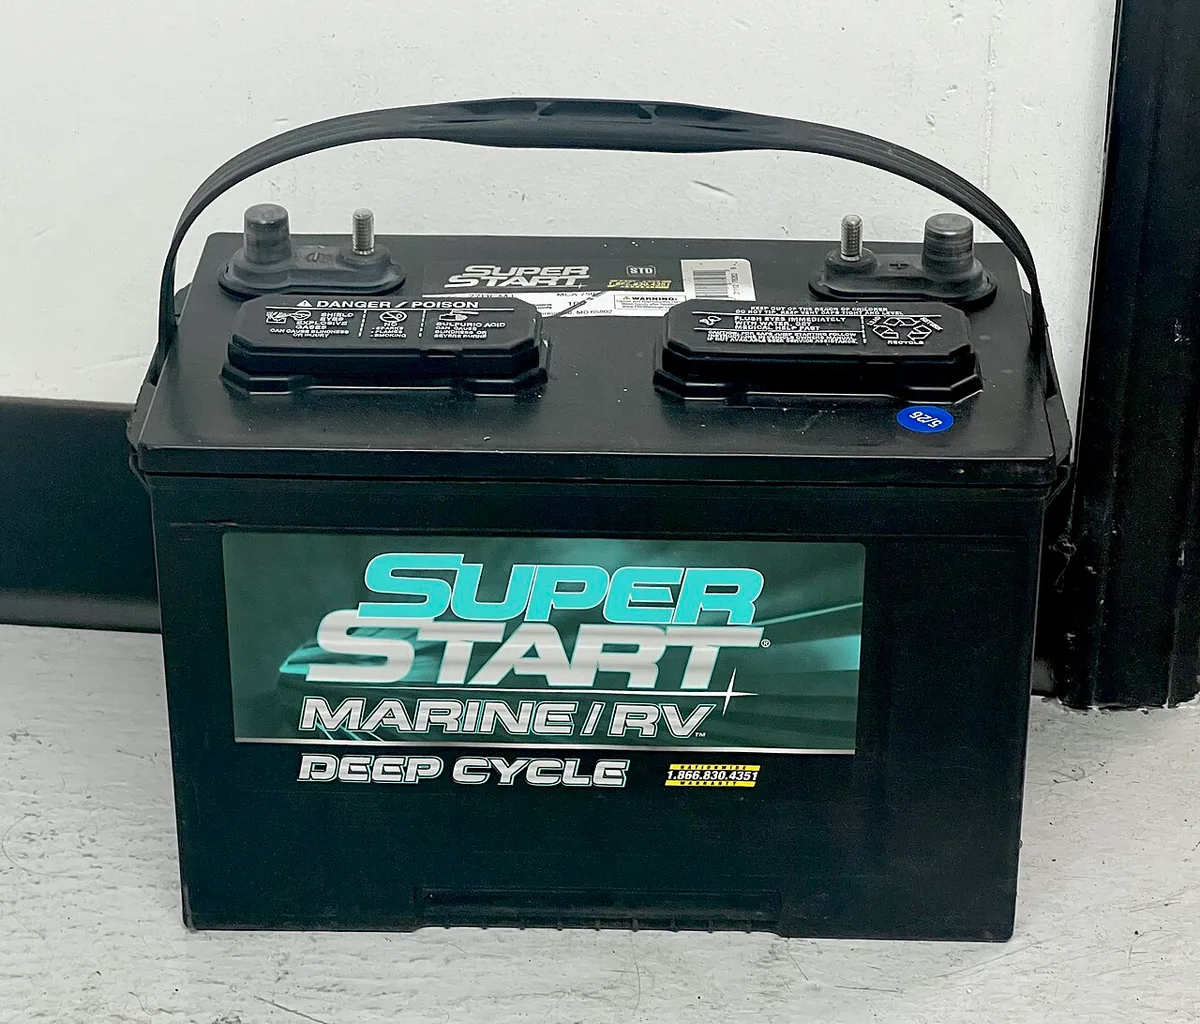
Image source: Wikimedia Commons / TaurusEmerald (CC BY-SA)
LiFePO4 options provide longer lifespan but cost significantly more upfront. Verify your charger supports lithium chemistry before upgrading. Incompatible chargers can destroy expensive batteries or create fire hazards.
Check the existing battery label for group size and Ah rating. Match these specifications exactly unless upgrading intentionally. Undersized batteries fail prematurely while oversized ones may not charge properly.
Inspect terminals for white or blue corrosion buildup before removal. Clean connections ensure accurate voltage readings during testing. Corroded cables often indicate deeper charging system problems needing attention.
Step-by-Step Replacement Process With Critical Testing Protocols
Gather insulated wrenches, safety glasses, and acid-resistant gloves first. Turn off the AC charger and unplug it from the wall outlet. Disconnect the DC load wires from the battery terminals.
Remove the negative black cable followed by the positive red cable. Lift the old battery straight up to avoid acid spills. Clean the tray and inspect hold-down straps for damage.
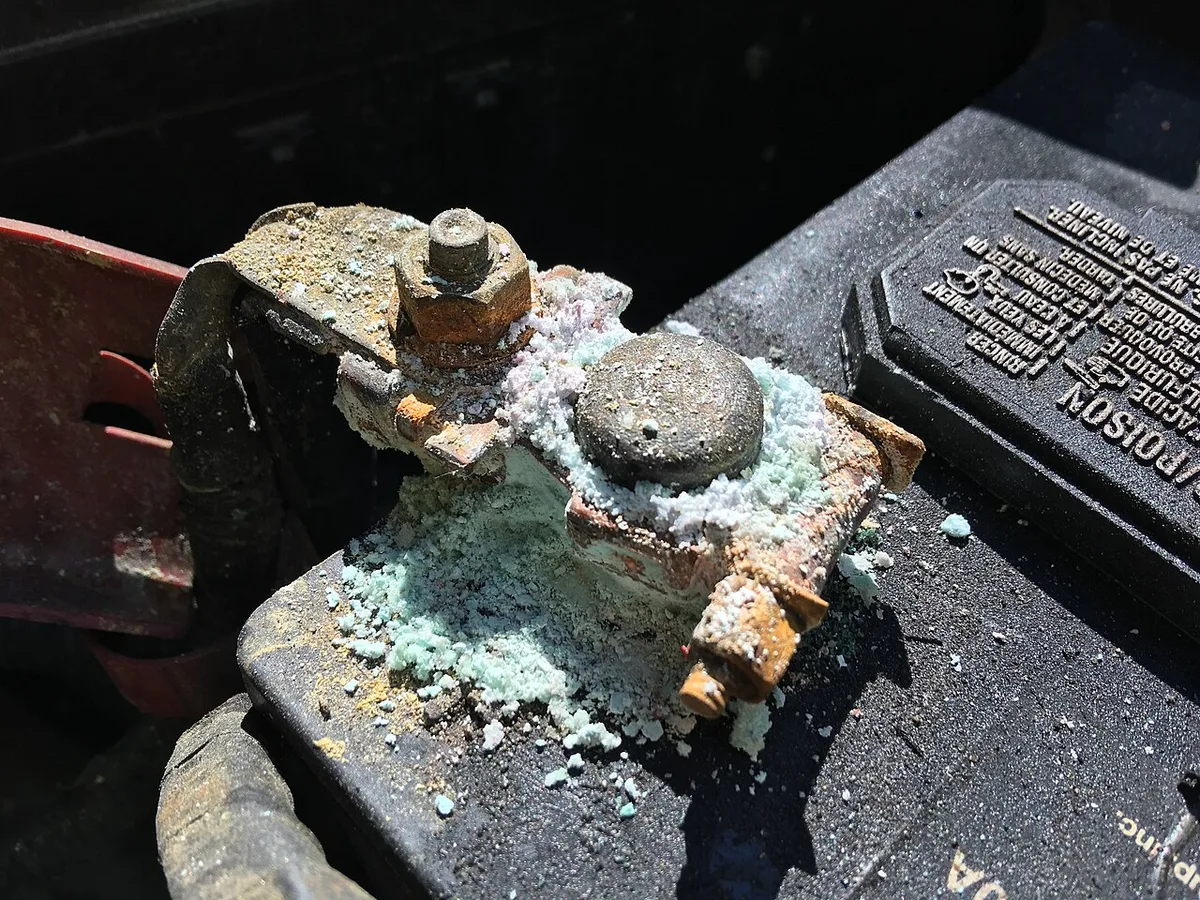
Image source: Wikimedia Commons / MarkBuckawicki
Place the new battery securely in the enclosure. Connect positive red cable first then negative black cable. Tighten terminals snugly without overtightening soft lead posts.
Restore AC power and verify charger indicator lights show normal operation. Use a multimeter to confirm charging voltage reaches 13.8V to 14.4V. Run a functional test by lifting the float switch manually.
Measure voltage drop during pump operation to assess battery health. Acceptable systems maintain above 11.5V under full load. Significant drops suggest undersized batteries or connection resistance issues.
Common Installation Mistakes and Long-Term Maintenance Schedule
Many homeowners install automotive starting batteries instead of deep-cycle models. Starting batteries cannot handle repeated discharge cycles and fail within months. Always use batteries rated specifically for standby power applications.
Forgetting to secure the battery properly causes vibration damage over time. Loose batteries crack internally or spill acid during pump activation. Use manufacturer-approved straps or brackets to prevent movement.
Neglecting post-installation testing leaves failures undetected until emergencies strike. Load testing confirms the entire system works as designed. Skip this step and you risk discovering problems during actual floods.
Image source: Wikimedia Commons / Wesha
Schedule quarterly visual inspections for corrosion and fluid levels. Test runtime annually by simulating power loss conditions. Replace flooded batteries every three to five years regardless of apparent condition.
AGM batteries typically last five to seven years with proper care. Lithium options may exceed ten years but still need periodic verification. Document maintenance dates to track performance trends over time.
Proper disposal follows EPA universal waste regulations for lead-acid units. Most auto parts stores accept old batteries for recycling free of charge. Never place spent batteries in regular trash or curbside recycling bins.