

Image: Maytag commercial dryer interior components
Credit: www.maytag.com
Commercial laundry operations depend on reliable equipment, and the Maytag commercial dryer is built for high-volume use. When issues arise, quick diagnosis saves downtime and repair costs. This guide covers the most frequent problems, practical troubleshooting steps, and safety reminders for 2026 models and legacy units still in service.
Whether your dryer won’t start, fails to heat, or shuts off unexpectedly, the steps below will help you identify the root cause and decide whether to repair in-house or call a technician. For more on this, see our guide on lg dryer troubleshooting codes.
Common Maytag Commercial Dryer Problems Overview
Before diving into specific symptoms, it helps to understand the systems involved:
| System | Function |
|---|---|
| Power Supply | Delivers 240V to motor and heating elements |
| Drum & Belt | Rotates clothes for even drying |
| Heating Element | Electric coils or gas valve for heat |
| Ventilation | Draws moist air out safely |
| Controls | Timer, thermostat, and sensors |
Most breakdowns stem from wear, lint buildup, or electrical faults. Let’s walk through each symptom systematically.
Dryer Won’t Turn On
A dryer that doesn’t respond when started usually points to power issues or safety switches.
Step-by-Step Diagnosis
Check Power Source
- Confirm the dryer is firmly plugged into a dedicated 240V outlet.
- Inspect the circuit breaker panel—look for tripped breakers.
- For hardwired units, verify connections at the junction box.
Test Voltage
- Use a digital multimeter set to AC volts.
- Measure between hot wires: should read ~240V.
- Between either hot wire and neutral: ~120V each.
Inspect Door Switch
- Located on the door frame.
- With door closed, press actuator—heater should activate briefly.
- Test continuity with multimeter: closed = beep or low resistance.
Thermal Fuse Check
- Usually near exhaust housing.
- Remove wires and test continuity.
- No continuity means replacement required.
⚠️ Safety Tip: Always disconnect power before testing internal components.
For broader LG diagnostics, refer to our guide on dryer fault codes
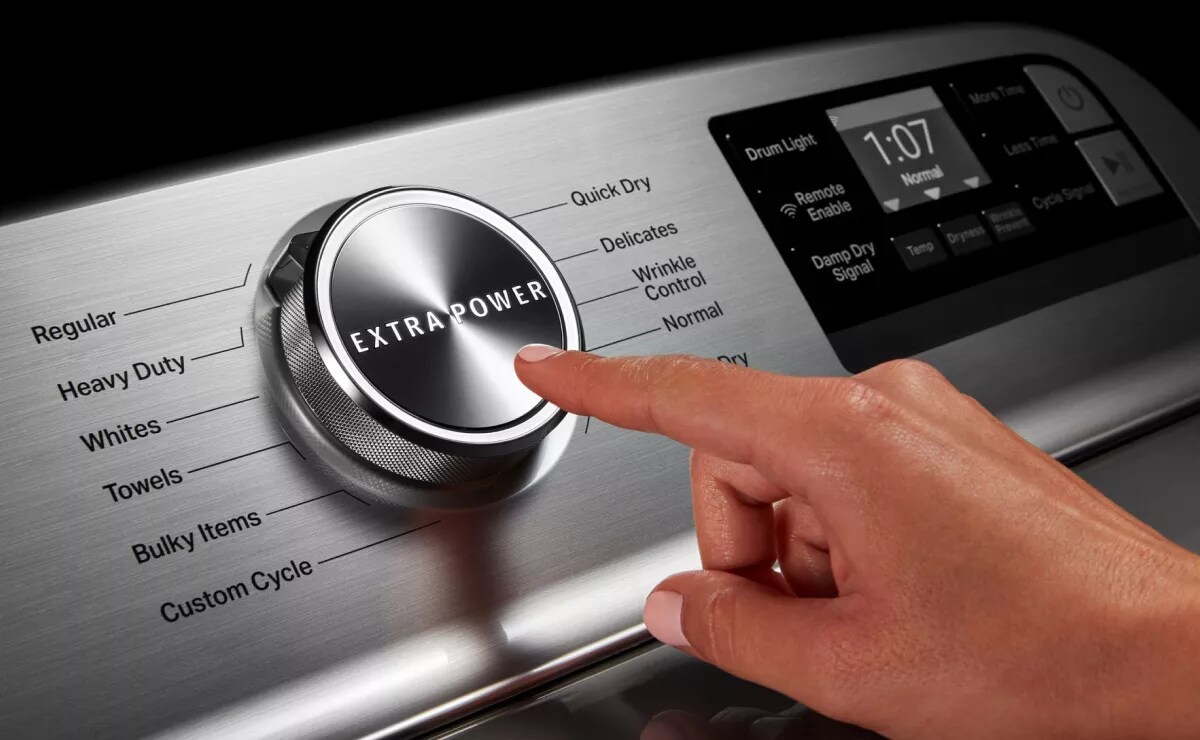
Image: Maytag commercial dryer control panel and door switch area
Credit: www.maytag.com
Drum Doesn’t Spin
If the motor hums but the drum stays still, suspect belt or motor problems.
Belt Inspection & Replacement
Tools needed: Screwdriver set, socket set, flashlight
Steps:
- Unplug dryer.
- Remove front panel screws/bolts.
- Lift top panel upward (most models pivot forward).
- Locate drive belt wrapped around motor pulley and drum.
- Look for cracking, fraying, or slack.
- If damaged, release tensioner arm and slide old belt off.
- Route new belt following factory routing diagram (see manual).
- Reinstall panels and test spin cycle.
🔧 In practice, replacing the belt yourself costs under $30; hiring a pro averages $150–$200.
Motor Troubleshooting
Motor failure symptoms include:
- Humming sound with no movement
- Burning smell
- Excessive heat near rear access panel
Diagnosis:
- Visually inspect for burned windings or loose mounts.
- Test motor terminals with multimeter—look for short circuits or open circuits.
- Check start capacitor if present—bulging or leaking means replace.
⚠️ Note: Motors draw high current—electrical work beyond basic checks should involve certified technicians.
Dryer Not Heating
Heat loss leads to damp loads and extended cycle times. Root causes vary depending on fuel type.
Electric Dryers
Primary Culprits:
- Heating Element Failure
- Thermal Cut-Out Device
- High-Limit Thermostat
Testing Procedure:
- Access element by removing rear panel.
- Disconnect wires from element terminals.
- Multimeter test across element leads:
- Normal reading = 10–50 ohms
- Infinite resistance = burned-out coil → replace
- Test associated thermostats similarly:
- Continuity = good
- Open circuit = replace
Gas Dryers
Key Areas:
- Igniter glow
- Flame sensor detection
- Gas valve solenoid operation
Checklist:
✅ Does igniter glow red/orange? ❌ If not → likely faulty igniter (common failure point) ✅ Do you hear clicking/pulsing flame? ❌ Could mean bad flame rectifier or gas valve issue
🛠️ Replace faulty parts individually rather than entire valve assembly unless multiple components failed.
Dryer Takes Too Long To Dry
Slow drying cycles frustrate users and increase utility bills. Airflow restrictions are typically the culprit.
Lint Filter Maintenance
Clean after every load:
- Brush away debris gently.
- Wash monthly with mild detergent and warm water.
- Air-dry completely before returning.
Ventilation Blockage
Over time, lint accumulates deep within ducting:
- Disconnected flex hose behind dryer
- Rigid metal pipe runs to exterior wall cap
Cleaning Schedule:
| Component | Frequency |
|---|---|
| External vent cap | Monthly |
| Full vent line (professional cleaning) | Annually |
Use a dryer vent brush kit ($20–$40): Insert via exhaust opening and scrub thoroughly.
Moisture Sensor Malfunction
Located inside drum or lint chute:
- Wipe clean with rubbing alcohol.
- Calibrate manually per manual settings.
- Replace if readings remain erratic after cleaning.
💡 Tip: Overloading reduces tumbling efficiency, leading to uneven drying and false sensor readings.
Dryer Makes Noise During Operation
Unusual sounds signal mechanical wear. Address promptly to prevent cascading failures.
Drum Bearing Wear
Symptoms:
- Low-pitched squeal or grinding noise
- Difficulty turning drum by hand
Repair Steps:
- Remove front panel.
- Slide out drum carefully.
- Replace bearing assembly (~$15–$30).
- Realign drum during reassembly.
Roller and Pulley Issues
Rollers support drum rotation:
- Listen for rhythmic thumps or squeaks
- Check for flat spots or seized bearings
Replace both sides simultaneously to maintain balance.
Blower Wheel Damage
Found in housing beneath drum:
- Rattling indicates loose or damaged blades
- Can block airflow if cracked
Remove blower housing cover and inspect visually.
🔩 Pro Tip: Apply food-grade lubricant to roller axles annually to extend life.
Dryer Shuts Off Prematurely
Premature shutdowns interrupt workflow and leave clothes damp.
Moisture Sensor Contamination
Buildup affects accuracy:
- Clean sensor strips with fine sandpaper or emery cloth
- Reset calibration mode (varies by model—check manual)
Faulty Timer Contact
Older dial-type timers can misread cycles:
- Observe display behavior—does it jump erratically?
- Consult service technician for mechanical inspection
Thermostat Cut-Out Activation
Triggered by overheating:
- Often tied to blocked vents
- Reset button exists on newer units (hold 3–5 seconds)
After addressing airflow issues, reset and monitor performance.
Dryer Door Won’t Stay Closed
Poor sealing compromises heating and safety interlocks.
Latch Alignment
Misaligned latches prevent secure closure:
- Adjust strike plate position slightly upward/downward
- Ensure door sits flush against gasket
Broken Door Hinge Pins
Visible sag suggests hinge wear:
- Remove hinge pin with punch tool
- Swap out for OEM replacements (~$10/pair)
Always reattach springs correctly to retain tension.
Preventative Maintenance Tips
Routine care extends lifespan significantly:
| Task | Recommended Interval |
|---|---|
| Clean lint screen | After every use |
| Wipe drum interior | Weekly |
| Deep clean vent ducting | Quarterly |
| Lubricate moving parts | Yearly |
| Professional servicing | Bi-annually |
Avoid overloading beyond drum capacity rating printed inside door jamb.
🧼 Bonus Hack: Run empty cycle with tennis ball occasionally to dislodge hidden debris.
When to Call a Technician
While DIY fixes resolve many issues, consider professional help when facing:
- Complex electrical diagnostics involving control boards
- Gas line disconnections or pressure adjustments
- Persistent error codes unrelated to simple sensors
- Warranty-covered equipment requiring authorized service
Maytag recommends factory-trained repair specialists for warranty claims.
🔗 Learn more about interpreting LG dryer codes here
Final Thoughts on Maytag Commercial Dryer Troubleshooting
Understanding your machine’s systems empowers you to act fast when trouble strikes. Whether dealing with power loss, inadequate heating, or unusual noises, applying structured troubleshooting methods reduces guesswork and improves outcomes. For more on this, see our guide on top 7 best commercial coin operated washer and.
Regular maintenance—especially cleaning filters, checking vents, and monitoring moving parts—prevents most major breakdowns. However, when uncertainty arises, trust certified professionals to restore safe operation quickly.
With proper attention, your Maytag commercial dryer remains a dependable workhorse for years to come.
Frequently Asked Questions
What does error code 'F1' mean on a Maytag dryer?
Code F1 typically signals a failed control board or keypad input error. Turn off power for five minutes, then restart unit. If persistent, the control board needs replacement by an authorized technician. For more on this, see our guide on best commercial hand dryer.
Why won’t my Maytag dryer start even though it's plugged in?
Possible causes include a blown thermal fuse, broken door switch, tripped house circuit breaker, or malfunctioning timer. Start by verifying power flow using a multimeter and checking all safety switches.
How often should I clean the vent hose on my commercial dryer?
Experts recommend inspecting and cleaning the entire vent system quarterly. Complete professional cleaning annually ensures maximum efficiency and minimizes fire risk from accumulated lint buildup. For further reading, see lg.com.
Can I replace the heating element myself in a gas dryer?
Gas dryer heating issues usually involve igniters or flame sensors—not electric elements. Attempting DIY repairs involving gas lines poses serious risks; always hire licensed plumbers or appliance technicians for those tasks.
Is it normal for a commercial dryer to make occasional clicking sounds?
Small clicks during heating cycles are typical due to thermostat engagement. Continuous loud clanking or buzzing warrants immediate investigation—likely mechanical or electrical component wear requiring prompt repair.
Does running the dryer without clothes cause damage?
Briefly running an empty dryer causes no harm. Regularly drying small loads unnecessarily wastes energy and accelerates part wear—only run full loads whenever possible for best performance and longevity.