
Figuring out how to tell if a sump pump needs a check valve starts with listening for loud clunking noises after the motor shuts off. That distinct banging sound usually means water is slamming back down the discharge pipe because the internal flapper failed. You might also notice the pump turning on and off rapidly without actually emptying the basin effectively.
Manufacturer specifications indicate most residential valves last between five and ten years before mechanical wear compromises the seal. The International Plumbing Code requires these devices to prevent backflow that can burn out motors or flood basements. We will walk through specific diagnostic tests to confirm failure before you buy replacement parts.
Quick Diagnostic: Is Your Check Valve Actually Failing?
You know a sump pump needs a check valve when discharged water flows backward into the pit immediately after shutdown. Listen for a loud thud or watch the water level rise unexpectedly right after the motor stops running. Rapid cycling often confirms the valve no longer holds pressure against gravity.
The 3-Symptom Decision Tree
Use this conditional logic to isolate valve failure from other mechanical issues. Each symptom points to a specific type of mechanical breakdown inside the housing.
- If you hear a loud bang when the pump stops, then the swing flapper is slamming shut due to worn hinges or debris.
- If the pump restarts within seconds of shutting off, then backflow is refilling the basin and triggering the float switch repeatedly.
- If water visibly rushes back into the pit after discharge, then the rubber seal has degraded or the valve is installed backwards.
Distinguishing Valve Noise from Motor or Pipe Issues
Not every noise indicates a bad check valve. Bearing failures create a continuous grinding sound during operation rather than a single impact at shutdown. Loose pipe straps cause rattling throughout the entire cycle as water moves through the line.
Motor capacitor problems result in humming without rotation or sluggish startups. Water hammer specifically occurs at the moment flow reverses direction. Identifying the exact timing of the sound prevents unnecessary part replacements.
When to Test vs. When to Replace Immediately
Visible cracks in the PVC housing require immediate replacement regardless of performance. Leaks at union fittings often signal structural failure that testing cannot fix. If the valve is over ten years old and showing symptoms, skip diagnostics and install a new unit.
Testing makes sense when symptoms are intermittent or unclear. Younger valves with minor noise may only need cleaning or repositioning. Always verify orientation before condemning a recently installed component.
Step-by-Step Verification Workflow for Homeowners
Confirming valve failure requires systematic observation under safe conditions. Never work on electrical components while standing in water or touching wet surfaces. This workflow isolates backflow behavior without risking injury or equipment damage.
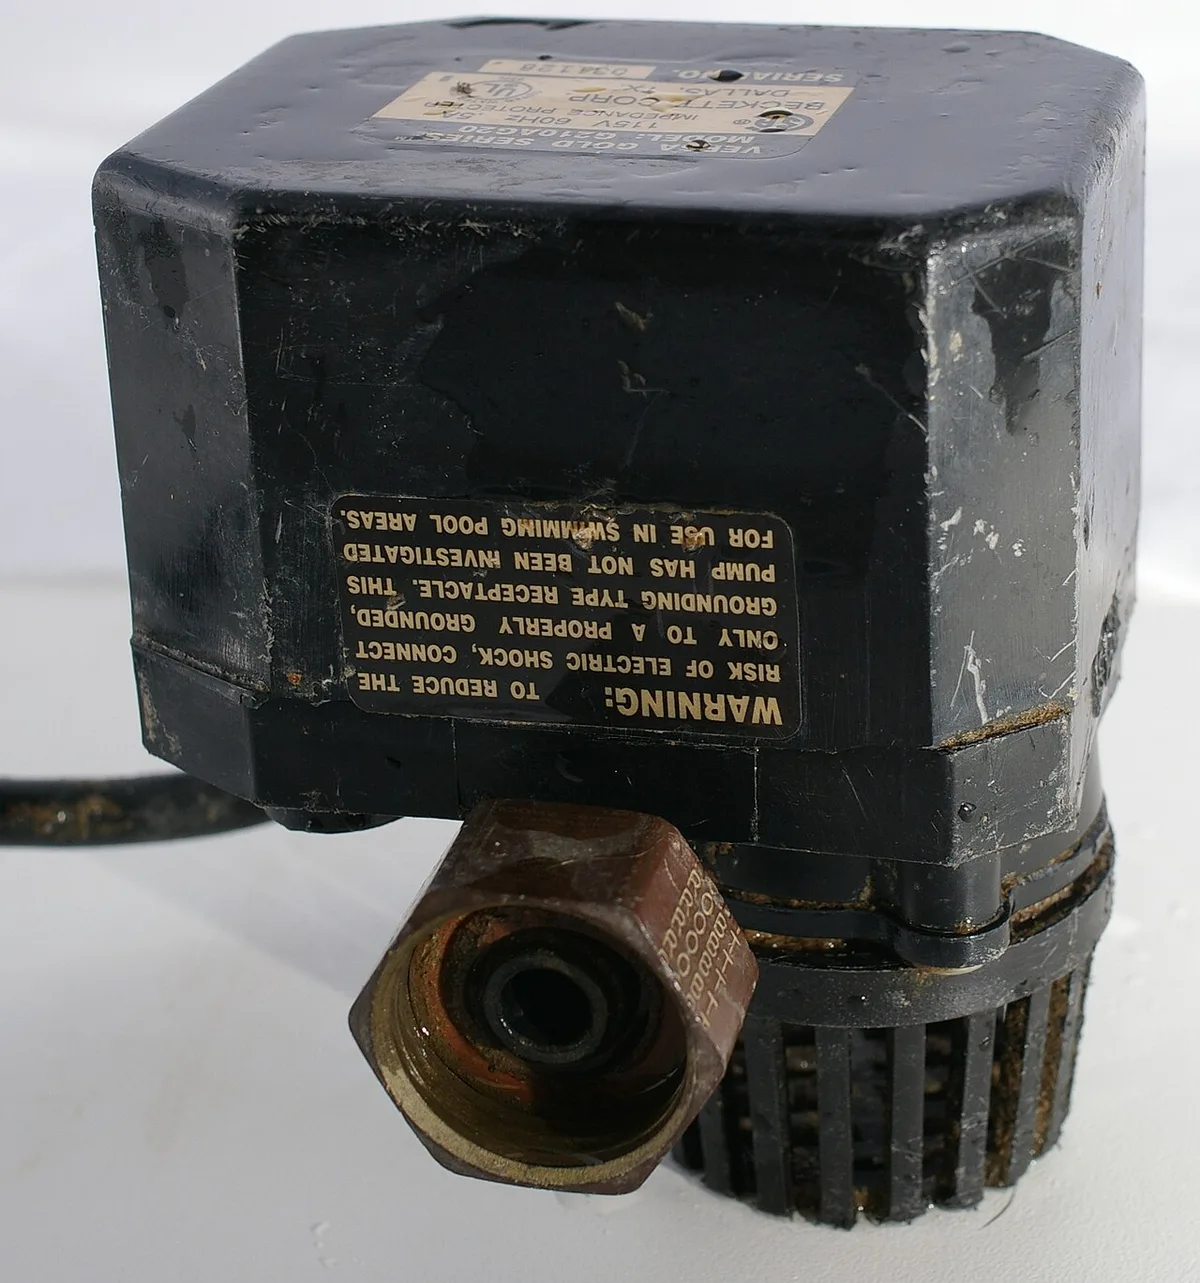
Image source: Wikimedia Commons / Hustvedt (CC BY-SA)
The Unplug/Replug Backflow Test
This simple test reveals whether water is returning to the basin after discharge. It works best during active pumping cycles when water volume is sufficient to demonstrate flow direction.
- Allow the pump to run until it shuts off automatically.
- Watch the water level in the pit closely for thirty seconds after shutdown.
- Note any sudden rise in water level that triggers rapid restart.
- Compare observed behavior against normal drainage patterns documented in appliance troubleshooting guides.
A rising water level confirms backflow through a compromised valve. Stable levels suggest the issue lies elsewhere in the system.
Visual Inspection of Orientation and Seals
Check valves have directional arrows molded into the housing. Installing them backwards guarantees failure and potential flooding. Verify the arrow points away from the pump toward the exterior discharge point.
Inspect union connections for cracks or mineral buildup that prevents proper sealing. Rubber gaskets degrade over time and lose elasticity. Clean mating surfaces thoroughly before assuming mechanical failure.
Safety Precautions Before Touching the Discharge Line
Always disconnect power at the GFCI outlet before handling plumbing components. Water and electricity create lethal hazards in basement environments. Wear protective gloves when working with PVC cement or sharp edges.
Ensure adequate lighting to see small cracks or orientation marks clearly. Keep towels nearby to manage residual water in the line. Proper preparation prevents accidents during inspection.
Repair Decisions: Fix, Replace, or Upgrade Your Valve
Deciding between repair and replacement depends on valve age and symptom severity. Minor debris jams sometimes resolve with cleaning. Structural damage or advanced wear demands new hardware.
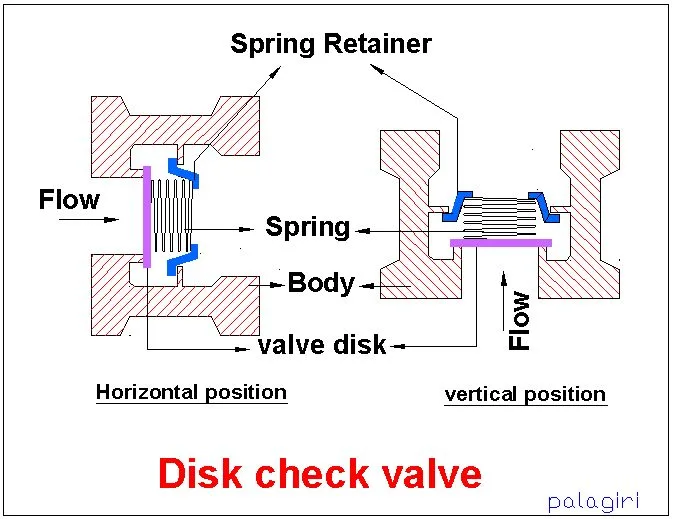
Image source: Wikimedia Commons / Palagiri (CC BY-SA)
Matching Valve Type to Your Pump’s Cycle Rate
Swing check valves work well for standard residential applications with moderate cycling. They rely on gravity and flow direction to open and close. Spring-loaded models handle high-frequency cycling better by forcing positive closure.
Silent check valves reduce water hammer in homes with long vertical discharge runs. Choosing the wrong type accelerates wear and noise problems. Match valve mechanics to your specific pump duty cycle.
Critical Installation Mistakes That Cause Repeat Failures
Installing valves horizontally when rated for vertical use causes premature failure. Gluing unions directly eliminates future service access and violates code. Skipping primer on PVC joints leads to leaks under pressure.
Failing to support piping above the valve transfers stress to the housing. Misaligned arrows guarantee backflow regardless of valve condition. Follow manufacturer instructions precisely to avoid callback repairs.
Cost Expectations and Lifespan Benchmarks
Standard PVC swing valves typically cost between fifteen and thirty dollars as of 2026. Silent spring-loaded models range from forty to sixty dollars depending on diameter. Professional installation adds labor but ensures code compliance.
Expect five to seven years of service from quality residential valves. Harsh conditions or frequent cycling shorten lifespan significantly. Budget for proactive replacement before catastrophic failure occurs.
For broader maintenance context, review our general appliance upkeep tips.
Common Sump Pump Check Valve Questions
Can I run a sump pump without a check valve?
Running without a check valve risks motor burnout from short cycling and potential basement flooding. Backflow refills the pit immediately after shutdown, forcing the pump to restart constantly. Most local plumbing codes mandate backflow prevention for permanent installations.
Temporary emergency use may be acceptable, but long-term operation requires proper protection.
Why does my new check valve make noise?
New valve noise often indicates incorrect orientation or incompatible type selection. Swing valves installed horizontally cannot function properly and will chatter. Spring-loaded valves may click audibly during normal operation.
Verify installation direction matches the flow arrow and confirm the valve type suits your discharge head height.
How often should I replace my sump pump check valve?
Replace check valves every five to ten years depending on usage frequency and water quality. Annual inspection during routine maintenance catches early wear signs. High sediment loads accelerate seal degradation significantly.
Proactive replacement costs far less than emergency flood remediation or motor replacement after backflow damage.
Does check valve size affect pump performance?
Undersized valves restrict flow and increase head pressure, reducing effective discharge capacity. Oversized valves may not seal properly at low flow rates. Always match valve diameter exactly to discharge pipe size.
Consult pump manufacturer specifications for recommended sizing to maintain optimal system efficiency and prevent cavitation damage.