
Learning how to install a sump pump discharge line correctly prevents basement flooding and protects your foundation from water damage. A proper installation moves water safely away from your home while meeting local plumbing codes.
The International Plumbing Code requires discharge lines to include an air gap and check valve to prevent backflow contamination. Getting these details wrong can lead to frozen pipes, burned-out pumps, or costly municipal fines as of 2026. Let’s cover the critical safety factors before you dig.
Why Proper Discharge Line Installation Prevents Flooding and Code Violations
The Real Risks of Getting It Wrong
A poorly installed discharge line creates three major failure points that compromise your entire waterproofing system. Frozen pipes are the most common winter issue when lines lack proper burial depth below the frost line. Water trapped in low spots expands when it freezes and blocks flow completely.
Backflow is another serious hazard if you skip the check valve or air gap fitting. When the pump shuts off, gravity pulls discharged water back into the basin without these components. This recycling burns out motors fast and risks contaminating potable water supplies through cross-connection.
Municipal code violations carry steep penalties for connecting sump pumps to sanitary sewers. These systems are designed only for wastewater, not groundwater or storm runoff. Inspectors can force you to excavate and redo noncompliant work at significant expense.
Always verify approved discharge locations with your local building department first.
Key Components That Keep Your System Safe and Legal
Every compliant discharge assembly needs four specific parts to function safely and reliably. The check valve prevents backflow and must be installed vertically above the basin lid. Choose a silent swing check valve to reduce water hammer noise during pump cycling.
An air gap fitting separates the pump discharge from any downstream drainage connection. This physical break prevents contaminated water from siphoning back into your home's water supply. Most jurisdictions require a minimum gap equal to twice the pipe diameter.
Schedule 40 PVC pipe provides the durability needed for buried exterior applications. Use 1.5-inch diameter for pumps under 3,000 GPH or upgrade to 2-inch for higher capacity units. Solvent-welded joints create watertight seals that resist root intrusion and soil movement better than mechanical couplings.
A freeze-proof yard hydrant or splash block manages the final discharge point safely. Hydrants drain automatically to prevent ice buildup in cold climates. Splash blocks disperse energy to prevent soil erosion near the foundation wall.
Both options keep water moving away from your structure effectively.
Step-by-Step Guide to Installing a Freeze-Proof, Code-Compliant Discharge Line
Planning the Route and Checking Local Regulations
Start by calling 811 to mark underground utilities before any excavation begins. This free service prevents accidental damage to gas, electric, or communication lines buried in your yard. Wait for all markings to be completed before breaking ground.
Check with your local building department about permit requirements and approved discharge locations. Some municipalities prohibit daylight discharge entirely and require storm sewer connections instead. Others mandate specific distances from property lines or neighboring foundations.
Document these rules to avoid rework later.
Map your trench route to maintain a consistent downward slope of at least 1/8 inch per foot. Low spots trap water and create freeze points even in properly buried lines. Plan the path to avoid tree roots, septic fields, and utility easements where possible.
Trenching, Pipe Assembly, and Check Valve Placement
Dig the trench below your local frost depth to prevent seasonal freezing. This typically ranges from 12 inches in warm zones to 48 inches in northern regions. Make the trench 6 to 12 inches wider than the pipe diameter for easier assembly and bedding.
Lay a 2-inch gravel bed in the trench bottom before placing pipe. This provides stable support and prevents settling that creates low spots over time. Assemble PVC sections using primer and cement according to manufacturer cure times.
Hold each joint firmly for 30 seconds to prevent push-out.
Install the check valve immediately above the sump basin lid inside the pit. Verify the flow arrow points upward toward the discharge outlet. Secure the valve with stainless steel band clamps rather than glue for future serviceability.
Test operation manually before backfilling to confirm proper seating.
Creating a Safe Air Gap and Final Discharge Point
Position the air gap fitting at the transition between interior and exterior piping. Mount it securely to a wall or standpipe at least twice the pipe diameter above any drain connection. This visible break satisfies cross-connection control requirements in most plumbing codes.
Terminate the exterior line at a splash block, dry well, or storm drain inlet as approved locally. Ensure the discharge point sits at least 10 feet from your foundation wall. Grade the surrounding soil to carry water further away from the structure naturally.
Backfill the trench carefully with select material free of sharp rocks or debris. Compact in 6-inch layers to prevent future settling that damages the pipe. Restore surface grading to match the original slope and promote positive drainage away from the house.
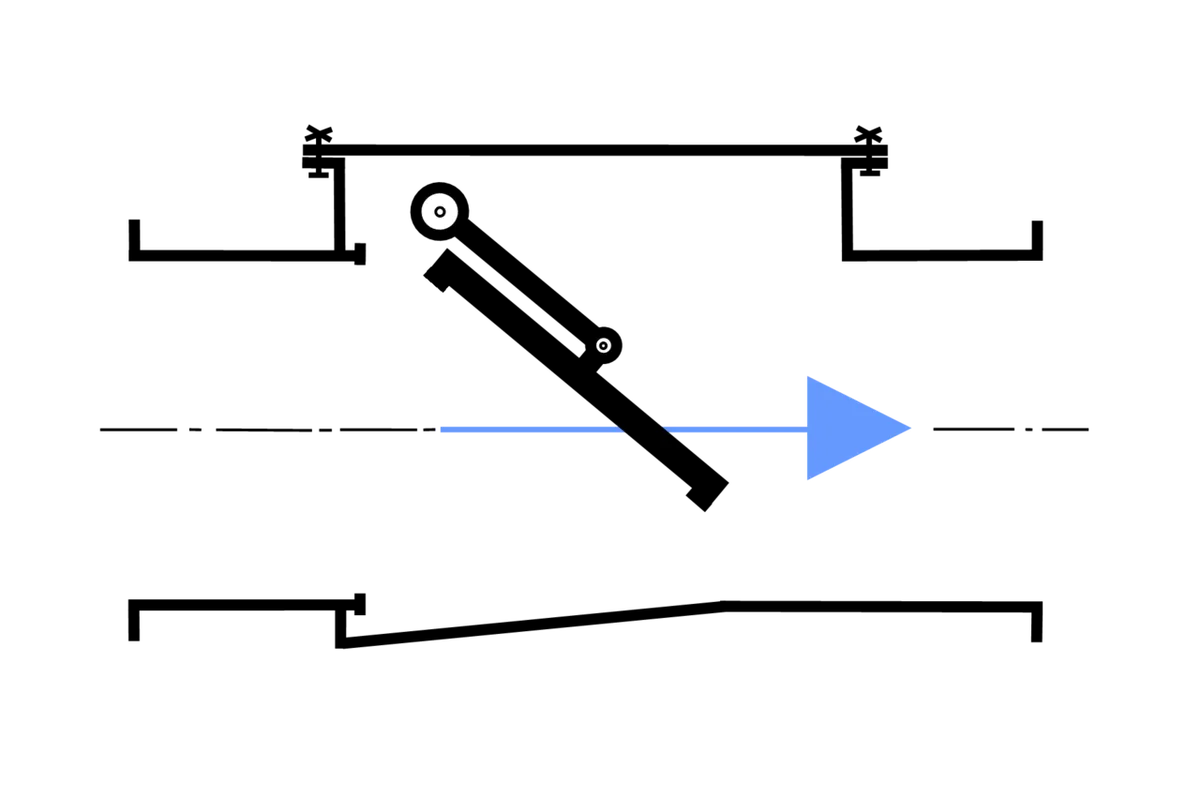
Image source: Wikimedia Commons / User:KaHe
Critical Mistakes That Cause Frozen Lines, Backflow, or Fines
Undersized piping restricts flow and increases head pressure on the pump motor. Many homeowners mistakenly use 1.25-inch pipe because it fits the pump outlet directly. Always reduce up to 1.5 or 2 inches immediately after the check valve to maintain rated capacity.
Skipping the weep hole on the check valve causes air locking and pump cavitation. Drill a small 3/16-inch hole just below the valve body on the discharge side. This allows trapped air to escape so the pump primes correctly every cycle.
Discharging too close to the foundation defeats the entire purpose of the system. Water seeps right back into the footing and recycles endlessly through the sump. Maintain minimum 10-foot separation and extend further if soil percolation is poor.
Gluing joints in wet conditions leads to seal failures that leak underground. PVC cement requires dry surfaces to chemically weld properly. Use a tent or heat gun to dry pipe ends before assembly if working in damp trenches.
Test all joints with water pressure before burying them permanently.
Frequently Asked Questions About Sump Pump Discharge Installation
Can I discharge my sump pump into the sanitary sewer?
No, connecting sump pumps to sanitary sewers violates plumbing codes in nearly all jurisdictions. These systems treat household wastewater and cannot handle groundwater volume during storms. Violations result in fines and mandatory disconnection.
Always use approved storm drains, dry wells, or daylight discharge points instead.
How deep should I bury the discharge line?
Bury the pipe below your local frost depth to prevent freezing. This ranges from 12 inches in southern zones to 48 inches in northern climates. Check with your building department for exact requirements.
Shallow burial guarantees winter blockages and potential pump burnout.
Do I need a permit to install a discharge line?
Most municipalities require permits for exterior drainage modifications involving trenching or sewer connections. Interior-only replacements sometimes qualify as exempt repairs. Contact your local building department before starting work to confirm.
Unpermitted installations risk fines and complications during future home sales.
What size pipe should I use for my sump pump?
Use 1.5-inch Schedule 40 PVC for pumps rated under 3,000 gallons per hour. Upgrade to 2-inch pipe for higher capacity models or long horizontal runs. Never use smaller diameter than the pump outlet.
Undersized piping reduces flow and strains the motor prematurely.